Showing posts with label Holiday. Show all posts

Tuesday, December 22, 2015

DIY Candy Gifts 2016

Hello world! I'm doing a gift post before January! I'm so happy, it's an accomplishment really. The joys of being a fourth year medical student. Anyways, this year I've tried using the phrase "holiday gifts" or "winter gifts" rather than Christmas gifts to be more inclusive to those people that don't celebrate Christmas. I don't, but I grew up celebrating "commercial Christmas" with my family, so we would always say Merry Christmas to people. I didn't think of the religious connotations till college when a friend of mine said, oh, I don't celebrate Christmas. So I tried switching my vocalizations to Winter Celebrations, or Happy Winter! It's a small correction, but it costs me nothing.

That's the thing, about "being PC" it's really just me saying that this thing that I'm doing/saying hurts/offends/excludes you, and it costs me nothing or very little to change, but it costs you a lot when you hear me say...make a joke about women, minorities, immigrants, etc. So I might as well change it. I don't understand the whole "our country is too PC" rhetoric that seems to have taken over some political stages. People are mad that they can't tell an off-color joke?

Frequently I find that people make hyperbolic examples to make their point that being "too PC" is a problem. For example it would not be unreasonable to hear someone say "Well, pink socks offend me/trigger me, so stop wearing them." This makes no sense not only because of the obvious hyperbole that usually the product of not being able to find a real example, but also because the issue of offensive jokes, etc is not that it affects one person, but rather an entire group of people that live a similar experience. Rather it seems like the polite, empathetic thing to do is to, when called out, think about why someone is saying they don't want you to tell that joke/say that thing/whatever else rather than just roll your eyes about having to "be too PC."

Now! On to these totally awesome DIY Winter gifts. During the winter months, no matter where you are, it gets colder...and for me that means time for hearty soups, casseroles, and candy.

So I figured what better way to help celebrate the coming of winter and the ringing in of the new year than with some simple to make candy that you can gift away to people!

Below are the recipes for: Chocolate spoons, Chocolate wreaths, and my personal favorite, the Sweet and savory toffee
Last year's DIY candy gifts can be found here.

Chocolate Spoons: A simple, but elegant gift you can give to your friends that they can use to sweeten up their morning coffee with or simply pop in their mouths for a pick me up. They're also lovely because you can decorate them any way you want.

What you need: Plastic spoons, bittersweet or semi-sweet chocolate (8-16 oz), toppings (marshmallow, sprinkles, cocoa nibs, peppermint pieces, more chocolate, toffee, etc.) 

Prep a baking sheet with parchment paper. Melt the chocolate in the microwave or double boiler. Dip just the spoon part of the spoons into the chocolate getting a good coating. Place the spoon on the parchment paper. Top it with whatever toppings you like. Place them in the fridge or freezer to cool, and then pack them up!

Chocolate Wreaths: Round pretzels (I used Utz that I bought from Costco), 16 oz chocolate, toppings (cocoa nibs, sprinkles, peppermint pieces, toffee) 

The key here is to buy pretzels that you'd want to eat just by themselves. If you buy pretzels that don't taste good, or are stale, you'll get beautiful wreaths that taste not so good.

Prep a baking sheet with parchment paper. Melt the chocolate in the microwave or in a double boiler. Add pretzels to the melted chocolate until you feel you've "saturated" the chocolate. You don't need each pretzel to have a thick coating, just enough that it coats it. Then give the pretzels a good toss in the chocolate. I used a spatula to do them. Then one by one, using a fork, pull out the pretzels and lay them on the parchment paper. After a row is done, go back and add the topping to your "wreath." Tossing the pretzels and using the fork adds a texture to the chocolate that makes it look more "wreath" like.

Savory and sweet toffee: This is my favorite. In fact I'm munching on some now as I write this. It's exactly the same recipe that I used last year for the Pretzel Toffee but instead of pretzels I used saltines and I definitely prefer the saltines. Seriously, make this. It's so easy -- you don't need a candy thermometer, you don't need anything fancy, you just need the ingredients, a baking sheet, and some parchment paper.

What you need: 1 cup salted butter, 8oz chocolate, 1 cup light or dark brown sugar, salt, toppings (cocoa nibs, marshmallows, sprinkles, chia seeds)

Preheat oven to 350F. Line a 9x13 baking sheet with parchment paper. If you don't have 9x13, use what you have and modify the recipe. Line the parchment paper with saltines. It doesn't have to be pretty, it just have to cover the bottom.

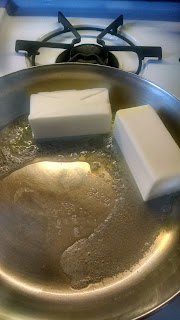
Then in a saucepan, heat up the butter and the sugar until it melts down and turns into a toffee. Should take about 2 minutes, watch it so it doesn't get too dark, you don't want it to burn. 


Then pour it carefully on top of the saltines, and spread it out. Don't worry if it doesn't cover everything, it'll spread in the oven. Put it in the oven for 8-10 minutes. Check to make sure it's not burning at 8 minutes. Pull it out, let it cool for a minute or two, then pour the 8oz of chocolate/chocolate chips on top.The heat from the toffee with the melt the chocolate. Spread it around in a thin layer.


 Then put your toppings on top! This year I went for a "messy" look, and mixed cocoa nibs, marshmallows, salt, chia seeds, and sprinkles on top. Pop it in the freezer for an hour to let it cool, then break it into pieces by hand and eat it or package it up to go! 


Sunday, November 30, 2014

The Shah (now Shah-Hoppenfeld) Tex-Med Holiday Extravaganza! AKA Thanksgiving 2014 in Review

My whole family is vegetarian. Well, my immediate family. For generations, we have been vegetarian. When my parents first moved to this country, that was a bit of a novelty. There weren't vegetarian restaurants galore, and whole foods selling all varieties of "fake meat." There was peas, cabbage, beans, and the occasional magic of tofu. Obviously this is hyperbole (sort of), but it's how they felt when they described it to me.

So obviously we never had the ginormous turkey for thanksgiving, and whatever it is people eat for the winter holidays. But my mom, always the light and life of our family, had a brilliant idea when I was a little girl of tex-mex holidays. After all, we love (no hyperbole) Taco Bell for it's vegetarian-friendly-at-no-extra-cost menu, so why not? Thus was born, the Shah (now Shah-Hoppenfeld) Tex-Mex Holiday Extravaganza!! No matter where I am, or who I'm celebrating Thanksgiving or the Winter Holidays with, I need Tex-Mex.

It reminds me of home, of tinsel wrapped around my banister, our big obnoxious plastic tree that was awkwardly bent at all angles but no one cared enough to fix it, my brother playing Golden-Eye, my dad looking at coupons for all the upcoming sales and separating out the worthwhile from the worthless, and my mom dancing in the kitchen taunting our dog with food singing "dancy-dancy, dancy-dancy, dancy-dancy-re!"  It might not make sense to you, but it makes perfect sense to me.

Now our family is bigger, with a lot more distance between all of us, but whatever. Nothing can stop the Shah (now Shah-Hoppenfeld) Tex-Mex Holiday Extravaganza. Full name, copyright pending.

So this year, we added in some new "traditionals" to the mix of our traditional. So along with tacos with all the fixings, we had cranberry sauce, brussel sprout salad, mascarpone mashed potatoes, and mushroom gravy.

So here's to what I'm most thankful for: a great family who will always add our own pzazz to tradition.

Cranberry Sauce - Modified from Laurie's Little Kitchen. Made it 2 days ahead of time to let the flavors meld. I made it in a slow cooker, and just dumped all the ingredients in -- instead of water, I used red wine, and for the spices I used 1 stick of cinnamon and 1 anise. I took the anise out half way so it wasn't overwhelming, and took out the orange when it was done cooking but left the cinnamon stick in. Loved it, will make it again. 

Brussel Sprout Salad - From my head. Sauteed up 2 bags of TJ shaved brussel sprouts with some olive oil, soy sauce, and a little bit of balsamic just until the shavings were wilted. Then mixed in cut up dried apricots, slivered almonds, and pistachios. Definitely one of the evenings favorites and will most certainly make it again. 


Butternut squash and apple soup - Modified from a food network site. Instead of carrots, I used 2 apples and used vegetable broth instead of chicken broth, and butter instead of peanut oil. I also added in garlic and onion. Overall, a phenomenal and easy soup to make. Especially if you get pre-cut butternut squash from TJs. Can you tell I use Trader Joes a lot? Served with sour cream, creme fraiche, or mascarpone with scallions.  
My brother sniffing the soup
Mascarpone Mashed Potatoes and Mushroom Gravy - Definitely the winners of the evening. The mashed potatoes are from What's Gaby Cooking and the gravy is from Oh My Veggies. I basically followed both recipes exactly, except I used some Thyme in the mashed potatoes, and didn't peel them. For the gravy, I didn't use shallots, but instead used a red onion since I really enjoy the flavor more, and didn't use mushroom stock but used regular vegetable stock from Better than Bouillon (which I love).  
The evening's winner. Barely any left by the end of the night.

Our Traditionals -- Spanish rice, guacamole, salsa, sour cream, tortillas (corn + flour), hardshell tacos, chips, lettuce, beans, etc. It was wonderful, although I did learn that making spanish rice in the slow cooker does not turn out as well as stove top. Everything else was great though. 


Then of course the extras:
Krinkle in his bed.  
Cooking Thanksgiving Dinner with Tyler!
The Shah (now Shah-Hoppenfeld) Tex-Mex Holiday Extravaganza!

Monday, November 17, 2014

GF Cucumber Canape

My goal: increase the number of posts I churn out. I love to write, good or bad, I love to write...which any of my friends from college who knew me first year (looking at you Sam and Liz) will laugh at. But whatever, writing is cathartic and expressive and lasting. With a blog though, there's a certain pressure to post something interesting or funny, or anything people want to read. And sometimes it's fun to write for the audience, but mostly it's stressful, so it's way more fun to just write for me.

I digress from my main point which is cucumber canapes. I've been searching the web and my mind-brain, high and low, for gluten free thanksgiving recipes that my mom (and of course the rest of my family) can enjoy and I came across this little gem. It's easy to modify for what you like, and takes like no time to make.
A wonderful amuse bouche or a simple side dish. Hate goat cheese? Try ricotta flavored with sage. Or whipped feta. Can't stand olives? Go with marinated mushrooms. Or roasted red peppers. Or even marinated lemon slices. Want to change the flavor? Pickled ginger with a little toasted sesame seed oil drizzled on top.

Cucumber Canapes

1 cucumber sliced as thinly as you like
Goat Cheese
Topping like olive
Salt and pepper for garnish

My only tip is to make sure the goat cheese is at room temperature so you can scoop it into a plastic bag, cut off the tip and pipette out the cheese onto cucumber slices.

Thursday, November 13, 2014

4 ingredient Coconut Macaroons and Surgery

Time is of the essence right now. I pre-make all my lunches, pre-prepare my protein shakes at night so my breakfast is drinkable, set my to go cup under the coffee maker so I just have to press a button, and after much trial and error have all my clothes laid out in the most time efficient manner so that when the alarm goes off at 4AM, I can hit snooze once, and then tumble out of bed and into my work clothes. Brush my teeth and let the dogs out after I hit the coffee button, brush my hair, put on some mascara, grab my lunch, kiss the hubs, and pet the dogs, and BOUNCE out the door to get to work on time.

It's dark when I get there, it's dark when I go home, but the OR is filled with bright lights, and of course blood, guts, etc.

It's a privilege to be able to see inside the human body, to be able to stick my hands where no one else's hands have ever been before. Which sounds totally odd and gross, but it's such a surreal feeling when you realize, hey, that's small intestine that I'm touching, or hey, that's a beating human heart that I just suctioned blood out of...it's nuts.

Then, if you're lucky, you get to suture. Take the U shaped needle in the needle drivers, and the forceps (not to be called tweezers as I was informed), and get to work on some tissue. Got vertical, go horizontal, no...hold it like this! Like a pencil, why are you putting your fingers like that? Don't tear the tissue! Excellent, that's right. Do it again. It's ridiculously exciting, and worth standing there for 10 hours barely suctioning and not spoken to, to have the privilege of feeling things, seeing things, and maybe even suturing things.

But time is definitely of the essence--study when you can, sleep as much as you can, eat when you can--my bastardization of a common phrase in surgery.

For me, bake when you can. Hence the 4 ingredient coconut macaroon that turn out delicious in under and hour. Dip them in chocolate, add in nuts, dried fruit, or any other flavors you want...crushed candy cane for the holidays? Pumpkin puree for the fall? Anything really...the macaroon is your oyster.
one kind of bad picture...I was too busy eating them to get a better picture

4-ingredient Coconut Macaroons 

3 cups sweetened, shredded coconut
4 egg whites
1 tsp vanilla or almond flavoring
salt

Mix egg whites, vanilla, and salt together. Add in the coconut. Mix together. Let rest for 10 minutes. Then form into mounds with your hands or a scooper if you have one. Make sure they're well stuck together.

Bake at 350 for 15-20 minutes, and then enjoy!

Sunday, September 14, 2014

Brunch Time! Easy Vanilla-Almond Baked French Toast

It's been a struggle to sit still recently and just enjoy the moment. Most doctors tell me, "Enjoy medical school, you'll never get the time off that you do then!" but then I everywhere I turn, friends are publishing papers and going to conferences, getting involved with all kinds of research, and I'm...petting my new puppy. Not to say that petting my new puppy isn't amazing, but it does leave one wondering, "Should I be doing all that?"

Those who know me know that I tend to obsess. It's a double edge sword really: if I need to sit down and study, I will sit down and study for 14 hours straight; if I lose something, I'll spend a hour and a half searching for it, and if I get concerned about whether or not I need to be doing something with my career/academics, I'll sit there and mentally chew on it for days until I'm out of my mind with nervousness and I internally implode and finally calm down.

Healthy, no?

Well, I'm a lot better than I used to be with the latter two. I don't really have an hour and a half to search for stuff now, and really what good does it do me to sit there and  constantly stress about whether or not I'm doing the "right thing" for my career?

So I just try not to. I'm not super successful, but when I catch myself careening over the edge of "what about research? Ahh! What if I don't get a residency? AHH! should I be going in after hours and shadowing?? AHH!" I just stop myself, take a deep breath, and eat a damn cookie. It's all gonna be okay, and I'm pretty happy. That, my friend, is a lot right there.

Speaking of happy, this french toast makes me happy because it's so unbelievably easy.  I found this recipe on one of my favorite blogs under the "Pretty. Easy." heading, and it definitely looked anything BUT easy.
 

It wasn't a lie though, it's crazy easy, and people come over and are all, "You made that?!" and you're all, "Yeah" in a bashful yet subtly cocky way. That's right, subtle cockiness will get you far. Fair warning, it's an overnight recipe, which can throw people off for the easiness factor, but trust me, it's easy. I've said easy about 8 times here, EASY.

Try it, you won't be disappointed.
Easy Vanilla-Almond Baked French Toast
Adapted from Pairs Well With Food

1 Loaf Challah Bread, sliced into 1 inch thick slices and laid out to dry for 30 min to an hour (honestly, I skip this step most of the time)
4 large eggs
2 egg whites
1.75 unsweetened vanilla almond milk (or regular)
1 tsp almond extract
1 tsp vanilla extract
0.5 tsp kosher salt
5 tbsp sugar
2 tbsp unsalted butter
1.5 cups sliced almonds
Maple syrup for serving

The night before
Put your bread in a pan for the overnight soak. Mix together the eggs, egg whites, vanilla almond milk, vanilla extract, almond extract and 3 tbsp sugar. Pour it on the bread, make sure it coats the bread evenly. Cover it, and stick it in the fridge overnight. If you're pushing it, you can soak for as short as 30 minutes and it's still delicious.

The day of
Preheat oven to 400F. Pull out your soaked bread. Line another baking dish (the one you'll bake the bread in) with parchment paper/butter the dish (<--what the butter in the recipe was for)/whatever you do to get things not to stick. On a plate, pour out your sliced almonds. Take one slice of the soaked bread, let the liquid drip off of it, and then coat one side of it with sliced almonds, and place it on your baking dish. Do this with all your bread.

Tip: I usually put the pieces of bread down into the baking dish first, then I put the sliced almonds on by hand, gently pressing them down to get them to stick.

Take the 2 leftover tbsp. of sugar and sprinkle them over the top of french toast. Bake for ~20 minutes. Serve hot with maple syrup!


Wednesday, January 2, 2013

New Year, 2013

I could...write a really long post about how it's been over a month since my last post. But that's been done. What have I been up to? Medical school. Surprise, surprise--it's busy. A bit busier than expected. I'll sum up a few things I've learned:

1. Medical school is busy-making.

2. Stonyfield Organics Chocolate Ice Cream is amazing. My cousin Rupa once told me that ice cream and frozen yogurt were NOT the same thing. I scoffed. She was in medical school and I was not. I agree with her completely now.

3. Things only are priorities if you make them one. AKA, your relationships and the NYTimes.

4. Thank god for friends and family. And Lauri's almond toffee. They keep you going. Oh, and blue flower early grey tea. Oh and jasmine green.

5. Weekend trips to Provincetown are amazingly refreshing.

6. People were right--going to the gym is good. If nothing else, it pulls you away from the books.

7. I'm pretty good at planning. Following through...meh, we'll go with okay.

8. Mascara makes your eye lashes look longer.

9. Complimenting yourself totes feels lame and awesome at the same time.

10. 11 hour train rides, even with your loves, are long.

11. Even if something is super hard and time consuming, if you really want to do it, it's cool. Doesn't make it suck any less, but at least it's cool.

12. I think I want to get a tattoo.

So that's my list. Happy New Year! I hope I learn a lot this year, academically, personally, bakery-ly, cookingly, TV-ly, Reading-ly, etc. I have an idea for a recipe--maybe this weekend? :-)

Tuesday, November 22, 2011

Pumpkin Pie Bars with a Hazelnut Almond Shortbread Crust (Gluten Free)

One excellent thing about being at home--I get to try out all kind of gluten free recipes. My dearest mother does not partake of gluten or any wheat product, and a lot of what you and I think of as "regular food" isn't so regular for her. 
It was too tasty for me to pause and take picture

So I love to try out different recipes that are typically gluten-ful, and turn them into gluten free! One such recipe: pumpkin bars. 


Pumpkin pie bars are exactly what they sound like, pumpkin pie...in the form of portable lovely bars. 


By the way, as a side note, I must say I am quite happy that it's fall/winter season and pumpkin is back. I missed it so much, and I always forget because by the end of the holiday season, I'm pumpkined out. 

Anyways, usually pumpkin pie bars are made with a regular shortbread crust, so instead, I made them with the hazelnut-almond shortbread crust. Super easy, totally gluten free. 


So, if you're having someone at your Thanksgiving table who is gf, then try this on for size. 


Pumpkin Pie Bars w/ Hazelnut-Almond Shortbread Crust
modified from joyofbaking.com


Crust


1 cup almond meal
1/2 cup raw, hazelnuts (filberts) 
0.25 tsp. salt
0.5 tsp. vanilla extract 
0.5 cup unsalted butter, room temperature 
0.5 cup light brown sugar


Filling


1 15-oz. can of pumpkin puree (2 cups) 
2 eggs
0.74 cup light brown sugar
1 tsp. ground cinnamon
0.5 tsp. ground ginger
0.125 tsp. ground cloves (0.125 = 1/8)
0.5 tsp. salt
1.5 cup heavy cream


Preheat oven to 350F 


Place the hazelnuts on a bakeware tray and put them in the oven to toast for about 10 minutes, or until they are fragrant. 


After that, pull them out, put them in a bowl, and cover them with another bowl completely. Leave them their to steam for about five minutes. To get the peels off, just hold the two bowls together and shake 'em up. Hold them pretty tightly, and they'll be mostly peeled, and that's good enough. 


Then toss them in the food processor, and process them until they're relatively fine. Then add in the sugar, salt, and the almond meal, and mix it until it's well mixed. 


Then add in the room temperature butter and vanilla. Process until it's well-mixed, and wet-ish. Put it in a 9x13 inch parchment papered pan, and spread it evenly. Bake it for 12-15 minutes,  or until the edges are browned. Pull it out and let it cool when it's done baking.


While it's baking, in a food processor, bowl, or cake mixer, mix 2 eggs well. Then add in the sugar, salt, the pumpkin puree, and spices, and mix well. Then slowly add in the heavy cream, you want to make sure that it's slow so that it doesn't get too frothy. 


Pour the filling on the cooled crust, and bake for 30-35 minutes. When it's done, allow it to cool before cutting it into bars or it will be too messy. Serve with whipping cream! 


Monday, November 21, 2011

Quick Berry Cobbler (Gluten-Free)

What to make for your gluten-free mother, at 8:30 at night, when you're too lazy to go drive and find a dessert?

Cobbler! It's quick, it's easy, it's usually make-able with stuff you have lying around the house, and it tastes fantastic with ice cream.
So before we get to the recipe, I must say: it's wonderful to be home. I have some time off from school right now because of Thanksgiving break, and I'm very happy to be at home with my parents and on break.

Before I continue on with the painfully quick and easy recipe, I want to put it out there, I hate it when people call Thanksgiving "turkey-day."

It's not at all because I am a vegetarian, and I understand the excitement and good-humor that surrounds the sobriquet...it's that it belittles the day. Thanksgiving, it's all in the name. The day is not about gorging turkey, mashed potatoes, and cranberry sauce while waiting for stores to open at midnight (a further sign of gluttony in my opinion)...it's about giving thanks for the things we are lucky enough to have.

By some luck of the draw, many of us in this country got lucky enough to have good family, no worries about food or water, a nice home, and high-speed internet. That's something we should take a day to be thankful for, and remember that we are in fact lucky. So please, call this Thursday what it is: Thanksgiving, and take some time to think about why you're thankful. For me?

1. I was lucky enough to marry my best friend
2. I have a loving family that has proved time and time again they will be there for me when I need them no matter what.
3. I got into a medical school.
4. Two adorable dogs who sadly roll around in dirt far too often for their own good.
5. My students and all the laughs, and even the troubles, they give me.

The list could go on...but really, I think it's cobbler time. Enjoy!

Easy [insert fruit here] Cobbler
Filling
1 cup fruit (berries, peaches, or apples work best, they can be frozen too)
2 tbsp. lemon juice
1 tsp. vanilla

1/4 cup sugar

Crust
1/2 cup rolled oats
4 tbsp. very softened butter
1/4 cup sugar

0.5 tsp. cinnamon
0.25 tsp. nutmeg
1 tsp. vanilla

Preheat oven to 350F.

Grab any small container that can be baked in. I used a tiny pyrex container. In a small, separate bowl mix together all the ingredients for the filling. After they are well mixed, spread them evenly into the container.

In another small bowl, mix together the butter and oats very well. Then add in the sugar, cinnamon, nutmeg, and vanilla. Mix well. Top the filling with the oats evenly.


 Put it in the oven for 15 minutes, and there you have it! Serve hot with cold ice cream. Enjoy!

Sunday, November 6, 2011

How To Make...Homemade Holiday Cards

It's always made me a little bit sad that we don't receive as much as people did "in the old days." Now it's just bills, ads, and the occasional notice of some kind. That's part of what holidays and birthdays so special...checking the mail to see that, lo and behold, people that you don't necessarily see everyday love you, and took the time to write words for you, put a stamp on an envelope and stick a card in the mailbox.


I love getting cards, so I send them. I try to remember the birthday/anniversary/big event of everyone close to me and send them a card, because I know I love it, so I am presumptuous enough to think they do too.

I'm not a genius of course, I use this site to help me remember these things, and it works wonderfully.

Anyways, if you're thinking of sending holiday cards this season, consider making them at home for a few reasons:

1. While there is an initial investment, it's cheaper overall.

2. It adds a bit of a personal touch to your cards, which is always nice to see. Plus, they're unique!

3. It's fun--get your girlfriends, or force your husband as in my case, to help you...they can make their own cards! Put on a movie, a plate of cookies nearby, and dooooo it.

Okay, so here are the basics you need:


  • 2 color ink pads, he
    • I use the brand "color box," more expensive, but the colors come out beautiful
    • Estimated Cost: $12
  • 1-2 Stamps
    • I used ones that said Happy Holidays and another was a small snow flake
    • Estimated Cost: $6
  • Glitter glue
    • I use clear, it goes well with everything
    • Estimated Cost: $2
  • Cards + Envelopes, any color you want
    • I used sparkly red, but in the past I've used lavender purple, green, etc.
    • Estimated Cost: Depends on the brand you get, and how many
I got all my supplies from Michaels. So like I said, you'll have to invest between $20-$25 up front, but you have card making supplies that make make a plethora of cards. Again, you can also jazz it up in your own way, get pretty ribbon and glue dots, and add some ribbon to your cards. 

Maybe get embossing powder and an embosser and get a little crazazy? Just me? Okay. 

An embosser and powder. Seriously, it's awesome.
Anyways, first, set up your situation:

--You want a drying station, where you can put the cards after they're made

--You want to have a small bowl with water, and dry paper towels nearby if you want to wash the color off your stamps or switch colors


Then you just go! Lay down a card, decide what color your want to use for what, and start stamping! 
My Mess
A few tips: 

--After you lay the stamp on your card, don't move it, just apply even pressure across the stamp. Even the slightest movement will lead to "ghosted" stamps. 

--If you screw up and the stamp is tilted, whatevs, go with it, use the glitter glue to make it look chic. 

--Expect to mess up a few times, I've been doing this for a while, and I still screw up.

Have fun, make some cards, and send them to people you love. It'll put smiles on their faces!