Showing posts with label Gluten Free. Show all posts

Sunday, February 14, 2016

Chocolate espresso dacqoise (gluten free), and science of egg whites!


Valentine's Day Menu
Lots of things are happening. My rank list is in. Tyler and I are going to Peru this week with a tenuous plan at best. Formation came out and I loved it. Hillary Clinton is running for president and is BOSS. Oh yeah, and I finished my last clinical rotation in medical school. It's weird -- it's almost like yesterday when I stepped on the wards for the first time, with a clean white coat (it's an odd shade of yellow-brown-white now), a stethoscope around my neck (which has since been replaced after losing it), and a pocket full of snacks and books (still there). I started on the Heart Failure service on my medicine clerkship with my "cohort" for the clerkship being Dave Cholok, Jason Kung, and Kira Masco, people I had never really talked to much or thought about much before the start of third year. My first presentation was...not good...and I spent at least 45 minutes preparing it. And now my next patient presentation will probably be as an intern, hopefully a little better than it was two years ago.

We'll see.

Look at all those layers!
Anyways, I made a dacqoise for valentines dinner! It's a french dessert made with almond and hazelnut meringue that seems super complicated to make, but it's really not. I made it, I know the pitfalls, now I can share them with you! And realistically...my future self. Anyways. It's simple. It's meringue, buttercream, and ganache. It just takes a full day mostly because you have to rest it and allow it to soften. Then at the end of the day, or the next day, you have a delicious, delicious cake. Arguably the best cake I've ever had.

Some science: Beating eggs

What is Cream of Tartar? 
It's an acid. It is the salt of tartaric acid. There are a few definitions for an acid two of which are that acids can be a proton donor, or an electron acceptor -- but this is a little too detailed to matter right now. What you need to know is that tartaric acid has a bunch of protons in it (or that it can accept a lot of electrons).

What happens when you beat eggs? 
You agitate it with a whisk enough that you (A) incorporate air bubbles that have water on their surface and (B) denature the proteins, meaning you make then go from gooped up blobs to unraveled. The proteins, since they are made up of a bunch of different atoms, start attaching to each other. Particularly, the sulfur ions that help stabilize the structure of the proteins start attaching to each other. These bonds surround some of the air bubbles, and "squeeze" the water off the surface of the air bubbles. This is why when you whisk egg whites sometimes you get that pool of water at the bottom if you let them sit for a minute.

What's the point of adding Cream of Tartar to egg white when you beat them? 

They "stabilize" the proteins. What that means is that the acid (protons) in the Tartaric acid bind to the sulfur ions and prevent them from bonding too tightly and keep them in an "open" loose formation. They keeps the water in the meringue for the most part and keeps your egg whites from deflating.

What does this mean?

This means that you can add any acid and achieve similar results! Lemon juice, etc. The upside to the tartaric acid is that (A) you don't add liquid volume and (B) you don't impart (much) flavor other than the tang of the acid if you add too much...which I've done before.

So wait...it doesn't increase the volume of the egg white?

Nope, beating it just does that, cream of tartar just stabilizes the proteins by donating a protein (or accepting electrons!). Another thing you can do to make your egg white beating go faster is not add sugar at the beginning.  This is because sugar attracts water (hygroscopic) and the crystals can get in the way of the egg proteins unravelling and finding each other. So if you add the sugar part way through, it can help keep the water in, and won't slow down your egg white beating.

Whew, now that we're done with the science...on to the delicious!

Chocolate-espresso dacquoise
Modified from Treats-SF

My advice when starting this --

  • read the directions for each component first and get your mise en place (ingredients ready to go). 
  • Actually put everything in the fridge for the resting times. 
  • Really make sure your meringue has a smooth top when you put it in the oven, it really makes life so much easier when you are putting the whole thing together later. For reals. FOR REALS. 
  • All components can be made ahead of time up to two days. Even the whole cake can be made a whole day ahead of time. 
Meringue

  • 4 egg whites (save the yellows, you need them for the buttercream) 
  • 3/4 cup almond meal
  • 1/2 cup hazelnuts, toasted
  • 3/4 cup plain white sugar
  • 1/4 tsp cream of tartar
  • 1 tablespoon cornstarch
  • 1/8 tsp salt 
Preheat oven to 250F 

Line a baking sheet with wax paper. Measure out a rectangle of 10x13inches and draw it in with a pencil. Then place the pencil side down on the baking sheet. This is important because it'll let you make a perfect rectangle, which will help with the dacquoise. You can get your parchment paper to stick by spraying the bottom of your baking sheet and then putting the parchment paper down.  

In a food processor, pulse 1/2 the sugar, all the hazelnuts, almond meal, cornstarch, and salt together into a fine texture. In the bowl of stand mixer, put the eggwhites and cream of tartar in the bowl, put it on low-medium and with whisk attachment, and whisk until foamy. Then turn up the speed to medium-high and slowly add the other half of the sugar. Keep beating until stiff peaks form. It took me 4-5 minutes. Then fold in the almond meal-hazelnut mixture in two batches. 

Spread it evenly on the parchment paper and make sure the top is as level as you can get it. Trust me, I didn't, and this step is important. 

Pop it in the oven for an hour and a half. Then turn the oven off without opening it (you don't want the heat to escape) and keep it in the oven for another hour to hour and a half to harden. Then pull it out and let it cool. 


German Buttercream 

  • 4 egg yolks
  • 2 tbsp sugar
  • 3/4 cup whole milk
  • 1.5 tsp corn starch 
  • 1/4 tsp salt
  • 2 sticks butter (16 tbsp) 
  • 2 tbsp amaretto mixed with 1.5 tbsp instant espresso or coffee
Basically a german buttercream is a pastry cream mixed with butter. It gives it a creamier texture. So you make the pastry cream first. Mix the egg yolks, sugar, and cornstarch in a medium heat proof bowl. In the small saucepan, heat up the milk until it's simmering, turn off. Then, while constantly whisking slowly mix half the milk into the egg yolk mixture. This tempers the egg yolks and prevents them from scrambling which is what would happen if you added them in right away. Then pour the whole shebang back into the saucepan and turn it back on, whisking constantly until it's thick like pudding.

Put it in the fridge for 30 minutes to an hour to cool down. 

After 30 min, in a stand mixer with a paddle attachment beat the room temperature butter. In three separate batches add in the pastry cream, scraping down the sides to make sure everything is well incorporated. Then add in the amaretto-coffee mixture. Turn it up to high and beat the crap out of that butter until it increases in volume and starts to look like a butter cream. 

You can store that covered in the fridge.


Ganache 

  • 6 oz bittersweet or dark chocolate
  • 3/4 cup heavy whipping cream 
  • 2 tsp corn syrup
Put the chocolate in a heat proof bowl. Heat up the heavy whipping cream and the corn syrup in a small saucepan until simmering. Pour over chocolate, and whisk it to incorporate. Donnnne. That step is easy. Oh yeah, and let it chill in the fridge for about 10-15 minutes until it's still liquid, but not hot. 

Okay, so with the meringue, cut it down with a serrated knife so it's 10 x 12 inches. You want to do this slowly, so you're using the weight of the knife to cut it. Then, make a mark/nick in the meringue to divide it into four equal parts. These will be your layers. Cut them length-wise gently. If it breaks...oh yeah, you can glue that back together with the butter cream/ganache, but try to keep them in one piece. 

Then lay them out on a baking sheet. Put 1/4 cup chocolate ganache on three out of four layers. spread it, save the remaining chocolate. Put it in the fridge for 20 minutes. Then pull it out, and but 1/2 cup of the buttercream on the layer that does not have chocolate. Then place the buttercream side down on top of a chocolate layer, so the buttercream and the chocolate are touching, and you're making a meringue-chocolate-buttercream-meringue sandwich. Then put more buttercream on the top of the sandwich (another 1/2 cup) and put a chocolate piece on top of that, adding to the sandwich. 

By the end of it, you should have a clean (no chocolate,no ganache) top, and a four layer sandwich going on. Then you want to coat the outside in whatever buttercream you have left. The most important part is the top, the sides can be coated kind of mehhh...but the top should be smooth and flat. 

Then refrigerate it for half an hour to an hour. I skipped this step, and boy did I pay for it. My stuff still turned out tasting amazing, but I mean, it was defffinitely not as pretty as it could have been. When you're about to pull out the dacquoise, pop the remaining chocolate in the microwave for 10 seconds to melt it so it's pourable but not hot. 

Pull out the dacquoise. Pour the chocolate on top, and quickly spread it over the top into a smooth layer. Then spread the chocolate that dripped on the sides. 

Almost done...

Topping


  • Hazelnuts
  • Toasted slivered almonds
Then you want to coat the side of the dacquoise in almond. You can do it with it sitting on a tray, or you can lift it up if you're so bold (I did, it's no big). Just press the almonds into the side. 

Then use the hazelnuts on top. You can line them up in a row to "mark" the pieces so it is easier to eyeball pieces when you cut. I put the slivered almond on the entire dacquoise because I wanted to...but you don't have to. 

Then refrigerate for hour or two before slicing. Or you can let it sit over night. Stays good for 2-4 days covered in the fridge. 

Best. cake. ever.

Friday, August 21, 2015

Cauliflower Bowl

I want to do things this summer/fall. I'll make a list. That way I'll get like 80% of them done.

1. Kayak on the charles
2. Get through Native Son, Notes on a Native Son, Queen of Shadows, and Lolita. A mix of books.
3. Join a book club.
4. Go camping x 2...hopefully in New Hampshire. Or the Berkshires!
5. Paint something
6. Finish applications...that way I know I do AT LEAST one thing
7. Train my dog to do 1 new tricks.
8. Run 2 miles at < 10 minute pace for each.
9. Finish Insanity
10. Find and purchase my "fall tea" collection.
11. Perfect my banana bread recipe.
12.  White Mountain Hike.
13. Start posting weekly menus


Thirteen things. I'll come back and mark them off as I go along. Hopefully. But this way I've articulated it, it's on paper....or e-paper in this case, and when I'm thinking...what should I do? I do this stuff. Instead of watching Fraiser. Too much Fraiser.

And now for something entirely different, a cauliflower bowl! I've been skeptical about cauliflower "rice" for quite some time. I've seen it all over other blogs, on pintrest, and some of my friends have gone on about how much they love it. But meh.

Then I saw this great cauliflower rice bowl from ohmyveggies.com and figured...why not? I have the time, I didn't yet have my articulated list of pre-prescribed activities. Plus, I think I can do it under 30 minutes. Hey, if I can make it in <30 minutes on a weekday, I'll give it a shot.

And this worked. The "rice" has no real flavor...so it's takes up the taste of whatever you season it with, in my case a little garlic, salt, pepper, and lime juice. It acts as a medium over which you can layer other flavors, beans, guacamole, salsa, corn, cilantro, red pepper, etc. and is healthier than rice.
 
Finished product!

Surprisingly easy to make if you have a food processor, without...it'd be harder. I used the grater attachment on mine to get the cauliflower small. I just cut it into raw relatively large chunks, put it in the food processor, and it's done. You can also use a box grater...or just cut it up into small pieces.

Then just sautee it up with some olive oil or butter until it reaches the "softness" you desire. Try it out.

Cauliflower Rice Bowl (Mexican flavor inspired) 

1 head raw cauliflower
Butter/olive oil

Optional toppings:
Beans
Salsa
Guacamole
Red Pepper
Corn
Cilantro
Tempeh
Lettuce
Hot Sauce
Red Onion

Cut the head of cauliflower into pieces that either fit into your food processor/food processor shoot, or to use on a box grater, or cut into small (super small) pieces.

When it's grated, heat up a pan with 2 tablespoons olive oil or butter, add garlic or whatever other aromatics you want at this point, then toss in the cauliflower when warm. Sautee the "rice," turning it moderately frequently until it reaches the crunchiness or softness you desire.

Then top it with your toppings! I did a Mexican-inspired one (see optional toppings above). You can do middle eastern inspired with some yogurt, roasted eggplant, yams, and spices. Or try Greek inspired with cucumber, tomato, red onion, yogurt, etc. Or Asian inspired and top with a stirfry.

The "rice" keeps in the fridge for ~2-3  days, so you can reuse it :-)


Saturday, August 15, 2015

Chocolate Chili Peanut Butter Popsicles

During my fourth year, I've been more able to give things outside of medical school more focus than I could during my third year. It's still pretty novel for me, but I'm trying to enjoy it. Going on run and experiencing summer: the smells, the colors, the inevitable allergic rhinitis. Dog walking and the inevitable apologizing for Krinkle barking a dog 10x his size. Trying new recipes and the inevitable mishaps (never put turnip and beet in coconut curry) and the undeniable successes.


These popsicles fall into the latter category. I forgot I had these popsicle mold I bought last summer with dreams of all different kinds of frozen treats. In reality, I made 2-3 types of popsicles and packed the molds away. But I've been craving them recently, because let's face it...there's nothing like coming back from a run in the middle of summer like a popsicle.
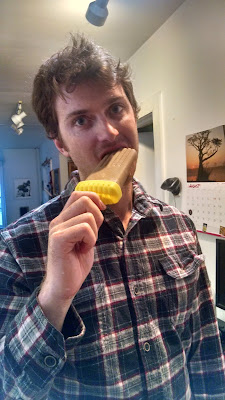
Telling Tyler "pull out the popsicles, I want to take a picture" and hearing "...whoops"

Especially these ones: chocolate + chili + peanut butter + honey + milk/yogurt + salt + popsicle mold + freezer = Honey sweetened chocolate chili peanut butter popsicles. Clearly when it comes to dessert names, size matters.
Evidence of their deliciousness

I made this in the morning in under 10 minutes on a whim. Try them out. If you're hoping to make it vegan, use full fat coconut milk. If you want to make them a bit healthier / don't love super sweet things, cut down on the honey by half.


Chocolate Chili Peanut Butter Popsicle

0.25 cup honey
1 cup milk / yogurt / half and half
0.75 - 1 cup peanut butter
0.33 cup unsweetened cocoa powder
1 tsp red chili powder / cayenne (or less if you want it less spicy)
1 tsp salt
Dash of cinnamon

Whisk together honey, milk, and peanut butter until there are no clumps. Then add in the cocoa powder, chili powder, salt, and cinnamon and mix until clumpless. Pour into popsicle molds and freeze for 3-4 hours. Pop them out on a warm summer day and enjoy!

Friday, May 15, 2015

Frozen Banana Bites

So third year is over. That happened. I'm taking some time to process, but I'll probably write about it. Let's be real actually, I'm not taking time to process, I'm studying for the Step 2 Boards and shoving my eyeballs into Bob's Burgers. And looking at desserts. Buuut I don't have eggs.

Let's ignore that Whole Foods is a two minute walk away, and that Trader Joes is a 10 minute walk away. Let's ignore that and talk about Banana Bites instead. I bought these Gone Bananas bites from Trader Joes a while ago...and they are so delicious. I feel quite adorable eating them. I forgot to buy them on this latest run...sadly, but I had 3 bananas that were getting a little too mushy for me to want to eat. So I figured...why not make my own?

Well if I was going to do that, I might as well put peanut butter on them. And oh wait, I had leftover homemade butterscotch sauce...so why not put this on top?

And so this delicious monstrosity was created...two frozen bananas with peanut butter in the middle, topped with butterscotch sauce, covered in chocolate and frozen again. They. are. so. good.

They'd be amazing even without the butterscotch sauce, but it definitely adds to the flavor. Make these. They are amazing and don't take long.

Frozen Banana Bites

3-4 bananas, sliced a quarter inch thick (or really how thick or thin you want, I wouldn't go more than 1/2 an inch thick though)
Peanut Butter (I used Skippy)
6 oz semi-sweet chocolate pieces
1 tsp canola oil or coconut oil
Optional: Butterscotch sauce (see above link for recipe from smitten kitchen!)

Slice up your bananas, put them on a baking sheet that's covered in parchment paper, and freeze them for about an hour. Then put down a layer of peanut butter, and put down another banana piece (so it's banana, peanut butter layer, banana...or you can keep it banana and peanut butter alone) and re-freeze for about an 1-1.5 hrs.  Then put a thin layer of butterscotch sauce on top (again, optional...but oh so delicious). Re-freeze for an hour. Right before you pull them out, melt the chocolate in a double boiler here's how. The short of it is that you put on a pot of water to boil, put a heatproof bowl over it, put the chocolate in, and stir around as the steam melts the chocolate. When the chocolate is full and melted, add the oil...why? It's a shorthand trick to 'temper' the chocolate, so that when you dip stuff in it, instead of being soft in texture and dull looking, it gets that chocolate 'crunch' and shine.

Pull out the banana bites, cover them in chocolate, re-freeze for about an hour, and enjoy! You can store them in a plastic back for up 2 weeks in the freezer. 

Monday, November 17, 2014

GF Cucumber Canape

My goal: increase the number of posts I churn out. I love to write, good or bad, I love to write...which any of my friends from college who knew me first year (looking at you Sam and Liz) will laugh at. But whatever, writing is cathartic and expressive and lasting. With a blog though, there's a certain pressure to post something interesting or funny, or anything people want to read. And sometimes it's fun to write for the audience, but mostly it's stressful, so it's way more fun to just write for me.

I digress from my main point which is cucumber canapes. I've been searching the web and my mind-brain, high and low, for gluten free thanksgiving recipes that my mom (and of course the rest of my family) can enjoy and I came across this little gem. It's easy to modify for what you like, and takes like no time to make.
A wonderful amuse bouche or a simple side dish. Hate goat cheese? Try ricotta flavored with sage. Or whipped feta. Can't stand olives? Go with marinated mushrooms. Or roasted red peppers. Or even marinated lemon slices. Want to change the flavor? Pickled ginger with a little toasted sesame seed oil drizzled on top.

Cucumber Canapes

1 cucumber sliced as thinly as you like
Goat Cheese
Topping like olive
Salt and pepper for garnish

My only tip is to make sure the goat cheese is at room temperature so you can scoop it into a plastic bag, cut off the tip and pipette out the cheese onto cucumber slices.

Thursday, November 13, 2014

4 ingredient Coconut Macaroons and Surgery

Time is of the essence right now. I pre-make all my lunches, pre-prepare my protein shakes at night so my breakfast is drinkable, set my to go cup under the coffee maker so I just have to press a button, and after much trial and error have all my clothes laid out in the most time efficient manner so that when the alarm goes off at 4AM, I can hit snooze once, and then tumble out of bed and into my work clothes. Brush my teeth and let the dogs out after I hit the coffee button, brush my hair, put on some mascara, grab my lunch, kiss the hubs, and pet the dogs, and BOUNCE out the door to get to work on time.

It's dark when I get there, it's dark when I go home, but the OR is filled with bright lights, and of course blood, guts, etc.

It's a privilege to be able to see inside the human body, to be able to stick my hands where no one else's hands have ever been before. Which sounds totally odd and gross, but it's such a surreal feeling when you realize, hey, that's small intestine that I'm touching, or hey, that's a beating human heart that I just suctioned blood out of...it's nuts.

Then, if you're lucky, you get to suture. Take the U shaped needle in the needle drivers, and the forceps (not to be called tweezers as I was informed), and get to work on some tissue. Got vertical, go horizontal, no...hold it like this! Like a pencil, why are you putting your fingers like that? Don't tear the tissue! Excellent, that's right. Do it again. It's ridiculously exciting, and worth standing there for 10 hours barely suctioning and not spoken to, to have the privilege of feeling things, seeing things, and maybe even suturing things.

But time is definitely of the essence--study when you can, sleep as much as you can, eat when you can--my bastardization of a common phrase in surgery.

For me, bake when you can. Hence the 4 ingredient coconut macaroon that turn out delicious in under and hour. Dip them in chocolate, add in nuts, dried fruit, or any other flavors you want...crushed candy cane for the holidays? Pumpkin puree for the fall? Anything really...the macaroon is your oyster.
one kind of bad picture...I was too busy eating them to get a better picture

4-ingredient Coconut Macaroons 

3 cups sweetened, shredded coconut
4 egg whites
1 tsp vanilla or almond flavoring
salt

Mix egg whites, vanilla, and salt together. Add in the coconut. Mix together. Let rest for 10 minutes. Then form into mounds with your hands or a scooper if you have one. Make sure they're well stuck together.

Bake at 350 for 15-20 minutes, and then enjoy!

Tuesday, August 5, 2014

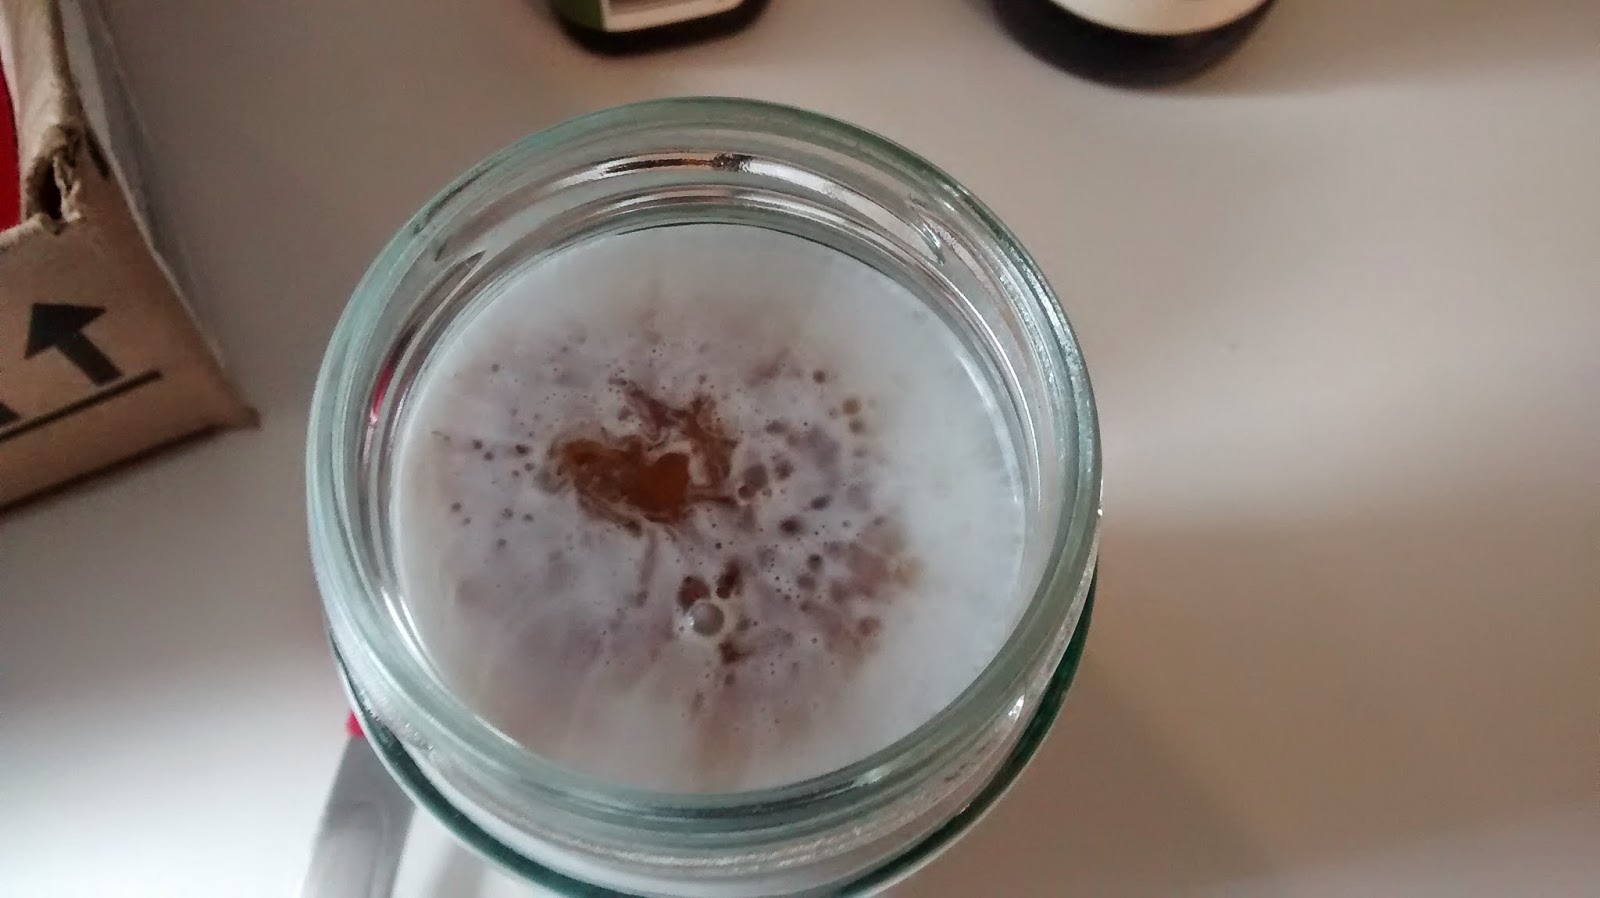
Vanilla-Almond Coffee Creamer (Vegan)

I got bored of studying the day before my Medicine Shelf Exam, I'll admit it. Shelf exams are basically big exams you take your 3rd year of medical school after you finish your "rotations." So I spent 2 months doing general medicine and cardiomyopathy (heart failure) and then took a big test. But after 2 months of studying/work, etc. I didn't want to study for the test the day BEFORE the actual test...so my mind immediately went to let me make a pie.

Then my mind-brain slapped some sense into me because I really didn't have time to make a pie. But I needed to do something, so I figured an iced coffee would be perfect on a muggy summer day. Buuuuut I didn't have any milk and I didn't feel like using almond milk, so out from my mind-brain that was straining against all the information about "what test would you do next?" or "what's is the diagnosis?" or "what would you advise the patient?" came this awesome coffee creamer and it's vegan!

I'm not vegan, but I can appreciate the deliciousness that is born from creativity when you can't use the deliciousness that is milk/cream/or cheese. And this is definitely delicious. It add just a touch of coconut flavor and sweetness, will a subtle almond undertone. Try it out, get creative with the flavors, go with hazelnut, try just vanilla, or just straight up coconut. Let the
creativity out, it'll taste delicious.


Vanilla-Almond Coffee Creamer  

1 can coconut milk (full fat is preferable)
2 tablespoons sugar (this is really to taste)
1.5 tsp vanilla extract
1 tsp almond extract

Before you open it, shake your can of coconut milk well otherwise it'll be separated and difficult to mix without it. Then just pour all the ingredients into your storage container or choice (I used a mason jar, then an old salad dressing shaker for my second batch), shake it up, pour it into your coffee, stir it and enjoy! I find it tastes best with iced coffee, but also fabulous with warm too.

For a regular cup of coffee I used around 1-2 tablespoons (eyeballs from pouring), you'll just figure out how much you like per cup of coffee. Also -- don't be disturbed if it separates a little when you pour it in, just stir it up and it'll be fine!


Monday, March 3, 2014

Modified Chile Rellenos

It's still winter. Spring break is around the corner, and it's still winter. My fingers, nose, and toes are well aware of that, but my brain and taste buds...not so much. I want tomatoes, I want avocados, I want iced coffee, iced tea, ICE. I want arugula salads with orange ginger vinaigrette, watermelon slices, frozen grapes, delicate asparagus, and cold noodle salad. I want spring, I want summer. I want sun, and flowers. Flats and shorts. Dresses and grass stains. I want it.

So to instead of doing a come-hither dance for the sun, I'm going to settle for spicy chile rellenos to light up my life, and belly. Chile rellenos are a Mexican dish that takes roasted chiles, stuffed with cheese, breaded in a delicious egg-based batter, pan fried, topped with a red sauce. It's amazing, wonderful, and immediately makes me think back to Arizona. Unfortunately, when I had a hankering for this dish, I didn't have the time or patience to make the batter, pan fry, etc.

So I modified it, and it was surprising easy, awesomely delicious, and as an added (unplanned) side benefit, healthier. This is definitely getting added into my weekly meal rotation.


Modified Chile Rellenos 
Serves 2-3

6 Poblano peppers (you can use any pepper, spicer or milder, poblanos aren't that spicy, but give a nice chile flavor)

Enchilada sauce (I used the Trader Joes brand, it's pretty good)
Mild Cheddar Cheese
Spinach

Extra stuffing/topping options: black olives, tomatoes, green onions, red onions, jalepenos, corn.

Wash the chiles, and put them on a cutting board. Lay the chile so it lays flat without rolling, and use a paring knife to make 2 cuts forming a T, one cut parallel to the stem, and one perpendicular, down the middle of from the stem to the tip. Expose the inside of the chile and scrape out the seeds. Be careful not to cut through the chile entirely, or not to cut off the stem).

Coat the chiles in a layer of olive oil, and broil them for about 5 minutes, turn them over, and broil for another five minutes. You want the skin to be blackened/charred, and the chile itself to be soft. When it's done, put in a heat proof bowl, and cover it for about 10 minutes. The steam from the chiles will make the skin easy to pull off.

Meanwhile put your stuff mixture together into a separate bowl. I mixed spinach and cheese together.

When the chiles are cool enough to handle, pull them out, and gentle peel off the skin, making sure not to pull apart the chiles. Then you want to lay the chiles onto a flat cutting board and place some of your cheese mixture in the middle, roll the chile around it, and put it into a baking dish. Do this with the remaining chiles. Cover with enchilada sauce and little more cheese. Bake at 350 for 20 minutes, and you're done! 

Wednesday, July 17, 2013

Easy Snack: Corn Pizza-tillas, Gluten Free!

Yesterday was our 2 year anniversary, and it was amazing. Great food, great company, pretty wine glasses :-) I'll be posting later what we had for sure...it was quite surprising for me.

But today, snack time! Want something quick, something tasty, something not so bad for you? Done! Corn Pizza-tillas. Gluten free and done in 10.


What you need: 

Corn Tortilla
Pizza Sauce (homemade or otherwise)
Veggies
Cheese
Any protein you want, I used tofurkey slices, but you could easily use something else.

Heat up a saute pan over medium heat, put the corn tortilla on it, layer sauce, then veggies, then protein, then cheese. Cover so the convection heat melts the cheese, and it's done and crispy on the bottom in ~5 minutes.

Enjoy! 

Tuesday, July 16, 2013

BBQ Tofu and Cheesy Potatoes

So many things are happening in the news that I don't even want to put into words what I'm thinking, but I'm sure y'all can figure it out:

1. Zimmerman got off because of a stupid law in Florida.
2. Texas passed the abortion bill
3. The House passed a version of the Farm Bill with NO Food Stamps. That's right. None.

So the world is happening.

And so is barbecue tofu in my house and seriously, talk about 30 minute meals. I missed the omnipresent BBQ sauce of my years in Texas and Arizona. Every place you went, there were at least be one bottle of BBQ sauce in the place. So I had the biggest craving for a Texizona meal--BBQ Tofu, Cheesy Potatoes, Rice, Roasted Tomatoes, and an Avocado.


Oh man, it was good. And it didn't take long at all. I promise you can make this meal in 30 min. or less.

What you need: 

BBQ Tofu

1 block extra firm tofu
bbq sauce (I used Stubb's, because well, ya can't take the southwest out of the girl!)
salt

Roasted Tomatoes

A handful of cherry tomatoes
BBQ Sauce

Cheesy Potatoes
2 tbsp. butter
6-7 small red potatoes
Whatever cheese you prefer, I used a cheddar mixture

Rice
As much rice as you would like, I used brown.
Salt
1 tbsp. butter

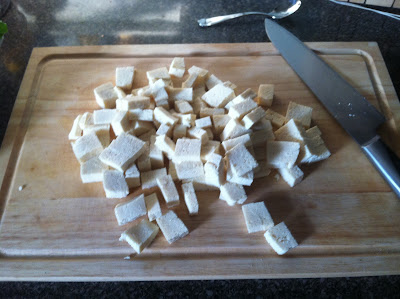
The morning you want to make the meal, strain the tofu, cut it into thin slices and put it on a baking sheet that is covered in paper towels. Cover the tofu in paper towels and try to press the liquid out of it. Cover it up with a fresh towel, and something heavy so that the water can wick away from the tofu all day, and put it in the fridge.

When you are ready to make the meal:

1. Put the rice on to cook first on medium heat, add salt and butter while it's cooking

2. Put the potatoes in a microwavable safe bowl with a little water at the bottom and nuke 'em for about 10 minutes, covered.

3. Pre-heat the oven to 400F

4. While this is happening, pull out the tofu, and put it in a mixing bowl with about 1/4 - 1/3 cup of bbq sauce. Honestly, it's an eyeball type of thing. If you like it really saucy, add extra sauce, if you like it with a hint of flavor, add less.

5. Toss the tomatoes into the bowl with the tofu and mix it up. Make sure to coat each piece of tofu in the BBQ sauce well.

6. Use tongs or your fingers (I just got in there with my fingers) to pull out the tofu and put it on a parchment lined baking sheet. You want to make sure they have a least a little bit of space in between them because you want the tofu to well-cooked on the outside.

7. Put the tomatoes in smaller, also lined baking sheet with whatever extra sauce you have.

8. Put both of them in the oven and bake for about 20 minutes.

9. Pull out the potatoes and use a fork to make sure they're cooked, if they are, smash 'em with the  fork and add in the butter and salt. Then add as much cheese as you'd like. I added a little less than 1/2 a cup.

10. Check on the rice, and strain it when it's done to your liking.

11. Plate the food! I put the potatoes on one side, rice on the other, layered the tofu on the rice, spread a strip of BBQ sauce on top with some cheese, and the tomatoes and avocado on either side.


Sunday, April 29, 2012

Udon Chard Wraps

We leave San Antonio in 40 days. We drive to Boston in 40 days. We leave Texas in 40 days. We start searching for an apartment in 44 days. We go to Paris in 50 days. We go to Hawaii in 76 days. We go to Arcadia in 92 days. And I become a medical student in 96 days. 


Woah, that's a lot of countdowns. I've been trying to ignore them recently though...just having fun with what I can do now, read books, teach children, read the newspaper...sleep late. All things I hope I can still retain to some extent in medical school.


That's one of my bigger fears, that it will be a "step back" in some way. That I have just gained my adult life, and it will be yanked away from me by school. Don't get me wrong, I am ridiculously excited for medical school, and going back to studying, but I am worried that I will gain a myopic perspective about studying, and I don't want that. I want to continue to be well-rounded, read books, cook, make random political commentary, etc. I understand that I can't do it to the extent that I am now, and I don't really want that, but I am going to work damn hard to keep it. Luckily, I also think Tyler will help me out in remembering that hey, I can and should take breaks! Anyways, on to the recipe! 


These udon chard wraps are really freaking good! Albeit kind of messy to eat...


They are already vegan, but they are easily made gluten free if you substitute the udon noodles for rice noodles, or for quinoa. Try them, seriously. They might sound weird, but don't run away...I swear! They're great! Also, they're pretty easy to make...it took me just under 30 minutes.


Udon Chard Wrap 


There are 3 parts to this recipe: sauce, chard leaves, and noodles. 


Sauce
3 tbsp. peanut butter 
1 tbsp. toasted sesame seed oil 
2 tbsp. soy sauce
squirt of your favorite hot sauce (mine is sriracha) 
handful of chopped chives 
slightly less than 1/4 cup water


Stir these items all together, and you have yourself one tasty sauce! Add some salt if needed. 

Noodles
Some tofu, cubed
udon noodles


Cut up the tofu into cubes, and saute them in some olive oil until they are lightly brown on either side. 


While this is happening, boil some udon noodles until they are the softness you like. Strain the noodles, and then mix the sauce into the noodles and let it cool.


Chard Leaves


Bunch of rainbow chard leaves, that are relatively in tact still


Cut off the stems of the chard leaves, until it's just the leaves. On the bottom of the leaf, there will still be a thick stem left...cut it out careful. 
--------
When everything is done, lay out a chard leave, fill the middle with a bit of the noodles, put a few slices of avocado, or some walnuts or pumpkin seeds in the middle, a splash of hot sauce, and roll it up like a burrito. Enjoy! 

Thursday, April 26, 2012

Green Eggs

Let me tell you about my allergies. I have never really had them before. In Arizona, allergies aren't crazy because it's too hot, and in Boston...well, I don't know why I didn't have bad allergies in Boston. But good heavens, in San Antonio...it's a whole new world! 


I didn't have allergies last year, but then again 2011 was the hottest year on record for Texas, as we went through a severe drought. This year, rain galore! And the flowers are out in full force showing off their pretty little petals. Me, thinking I'm immune, have taken no precaution against allergies. I drove with the windows down, kept the doors open, walk amongst flowers, etc. 
Key example: Tyler and I at the botanical gardens eating a picnic lunch (hence why his mouth is full of food), and inhaling all the demon pollen. But the flowers were pretty!
PSC, poor stupid child, that's what Tyler calls me. I came home earlier this week and proclaimed that I was getting sick...my nose was stuffy, my head hurt, and my eyes were all watery. He patiently informed me that I was suffering from allergies...and boy does it suck. 
The week was...hell-ish to go through, with me frequently telling my students that I needed them to whisper because my head hurt that much...but the weekend was great. I literally spent all of Saturday in bed with Tyler reading books, relaxing, using a Neti Pot (they work!), and drinking lots of water. Brilliant! On such days, it's quite important to have a easy go-to snack that is healthy and filling...ergo, green eggs! 
Basically, it' a hardboiled egg with cilantro pesto on top. Quite tasty, quite easy to make all the stuff ahead of time, and just keep it in your fridge as a go-to. 


Green Eggs


Cilantro Pesto


If you're not a fan of cilantro, feel free to replace any hearty green. I've done this with baby spinach, dandelion green, etc.


2 bunches of cilantro 
3 cloves of garlic 
0.25-0.5 cups of grated parmesan cheese (honestly, you can either grate your own, or if you're short on time, use the Krafts pre-grated kind of fake parmesan) 
2 tsp. lemon juice or white vinegar
0.25 cup olive oil 
salt and pepper to taste


Wash the bunches of cilantro and trim off the ends, so you have mostly the green leaves. Place them in a food processor and pulse a few times. Then add in the garlic cloves and turn it on to full-blast. Then add in all the rest of the ingredients. Taste and adjust as desired. This keeps in the fridge for about a week and a half, and in the fridge for month. I make it in large batches and just unfreeze it when I need it. 


Assembly


Just take a hard boiled egg or a soft-boiled egg, peel the shell, cut it in half, and spoon out a little bit of the pesto on top. This also make a really good party finger food. 


Other Ideas


The pesto makes a good pasta sauce, pizza sauce, spread on sandwiches, salad dressing when thinned out with more olive oil and a little water, or even a good dip for veggies when mixed with some greek yogurt or sour cream. 

Tuesday, April 24, 2012

Torta di Rizo

If you break it down, it's just a rice tart. I know, it seems a bit weird to put rice in a tart shell, but it's great. It's like a sweet risotto in a pie. What else could you want? Oh yeah, nutella and plump raisins on top. 
In other news, we have all our plan trips in order for Paris this summer...I'm quite excited! My big discovery of this process has been Airbnb. It's a website that blows my mind--it has listings of all the places, other than hotels, you can stay basically everywhere. So if Tyler and I wanted to travel to London, or even Alabama, we could find a nice little apartment to stay in for 2 days with a kitchen and laundry machine for basically cheaper than a hotel. Try it out for your next vacation, they're pretty good. 
Torta di Rizo (Rice Tart)
adapted from Jamie Oliver's Italy


For the crust -- I used myvanilla scented crust recipe. You can replace the whole wheat flour with all purpose while making this if you want. 


Filling


4 tbsp. butter
2 vanilla beans sliced in half, with the seeds scraped out
1.5 cups arborio rice
5 tbsp. granulated white sugar
zest of 3 lemons or oranges
0.75 cups white wine, I used pinot grigio. Whatever you use, just make sure it's something you'd drink
3.5 cups whole milk
2 eggs, whisked
2 extra tbsp. granulated sugar for the top


Preheat oven to 350F.


In a large saucepan melt the butter over medium heat and add in the seeds. Stir it around for 1-2 minutes. THen add in the rice, sugar, and zest. Saute the rice in the butter for about 3 minutes. Then add the wine. Stir the rice occasionally until most of the wine has burned off. 


Stir in the milk slowly. Stir the mixture over low heat for about 15 minutes. Most of the milk will be absorbed, but it'll still be liquidy, and the rice will definitely not be cooked--don't worry, it'll cook in the oven. 


Allow the rice mixture to cool for about 10-12 minutes, and then whisk in the two eggs, making sure to stir continuously so the eggs don't scramble. Then pour the mixture into the tart pan, and top with the extra sugar, and then bake for 20-25 min. 


Allow it to cool when it comes out, I topped it with raisins and and but of warmed up nutella. You can top it with any kind of dried fruit, and something tart--perhaps a jam that you've warmed up? Maybe some lemon curd? Let your imagination work! :-) 
**This can easily be made gluten free by using a gluten free pie crust**

Saturday, March 31, 2012

Thoughts of my Mother: Wanderlust and Palak Paneer

The recipe in this post will be rather long. It's not difficult, there are just several steps. If you want to try something new, try this.

Some people say my addiction to food is quite peculiar. My ability to remember exactly what I ate, and generally where I ate it, from years prior, I must say, is kind of weird. But food has always had a lasting impact on me. I think it's because so much of a culture is reflected in it's food. Indian, Moroccan, and Latin food with all of their spices conveys the spiciness and colorfulness of those cultures and regions, the eclectic mix of food you will find in America is the embodiment of the "melting pot," and the rich French food complements the culture where food can be the focal point of a person's day.

My baking style is me, but my cooking style is my mom: minimize the amount of dishes you need to clean, taste things and add a little more of this or that to make it just right, how to make meals for the week so you can eat well, but fast, how to make Indian food, Chinese food, American food, Mexican food, etc. My house was always filled with various spices, that to me were totally normal, but to most of my friends were completely foreign.

Some of the stories I remember most clearly from my childhood was when my mom and my Otti told me about food and food-experiences. They had the amazing opportunity, that a lot of people don't, to try new foods for the first time when they came to the United States. I would love to be able to remember the feeling I had when I first tried chocolate, or ate my first slice of pizza, or even what I thought of lettuce when I first chewed it. My mom can remember those things though: the first time she tried American chocolate (it's different!), saw and ate lettuce, ate at a Taco Bell...when she moved here, a totally different world of flavors opened up to her!

The story she told me, that will always stick with me, is when she cooked lettuce. She had moved to America recently, and was grocery shopping, and looking for cabbage to cook up, and saw lettuce. She wasn't really sure what it was (lettuce isn't all that common in India at the time), brought it home, and cooked it up. I remember her telling me about how confused she was...when she cut it, there was so much of it, but it cooked down to such a small, itty bitty amount. So of course she gave that to my father. Now he had been in the US longer, and knew it was lettuce. But he ate it anyways, without a word, because that's the kind of guy my dad is.

He took her to the store, and explain the different between lettuce and cabbage next time.

I am jealous that my parents had that experience. They were able to try new things, and remember them clearly. I want that, and I think that's why I have such a strong desire to travel, and see new things, and taste new things. It's hits your brain in a lasting way, and I want that experience my parents had, and could tell me about.

Today I felt inspired to cook because for the first time ever, I tried rhubarb. It's amazing...but that's a recipe for another time.

Anyways, I saw this recipe for Saag Paneer someone posted, and decided to make it the way I know how to, because it reminded me of being home. Saag Paneer and Palak Paneer are the same thing, literally translated, spinach cheese. It's basically creamed spinach and cheese cubes. It's fragrant, full of spices but not spicy, and filling. Quite easy to make too, and can last the week in a closed container in the fridge. If you've never had it, try it. You can find the spices at your local Whole Foods or if you live in Texas, Central Market.

Paneer (cheese)

You can either buy this frozen from outside or make your own, doesn't take that long.

0.5 gallon or 8 cups of whole milk
0.25 cup of lemon juice
0.5 cup warm water

Other stuff you'll need: cheese cloth or muslin cloth, fine mesh strainer, large pyrex bowl (optional)

In a heavy bottomed pot, bring the 8 cups of water to gentle boil, stirring occasionally to make sure the milk at the bottom doesn't burn. When it's boiling, add in lemon juice and warm water gradually, stirring all the while. You'll see the curds start to separate from the whey (liquid) right away. Turn off the heat, and continue stirring occasionally for about another minute or so.
Place the cheese cloth over the fine mesh strainer, and set that over the bowl. Slowly pour the curds and whey onto the cheese cloth, and you'll see the whey go through and catch in the bowl, and the cheese remain.
Once you pour it all through, lift the cheese cloth off the strainer, and twist it so the cheese in a ball, covered in cheese cloth (be careful, it'll be quite hot). Then just rinse the ball under cold water, to wash off any remaining lemon taste, and squeeze out any excess water. Place the whole thing under a heavy pot on a plate, and allow it to sit for about an hour to squeeze out the water.
When it's done, pull it out, cut it into cubes, and pan-fry the cubes in about 1 tablespoon of butter to brown them on the outside.

Palak (spinach)


1.5 lbs of fresh spinach, chopped (baby spinach is the easiest)
1 large red onion chopped finely
4 cloves of garlic (more or less depending on how much you like)
1 tbsp. butter
1 tbsp. ginger grated
0.75 cup plain yogurt or buttermilk
dash of cream
splash of lemon juice

Spices
2 cardamon pods
3 cloves
1 tbsp. cumin powder
3 tsp. tumeric (the yellow powder)
1 tsp. black mustard seeds
0.5 tsp. red chili powder or red chili flakes
1 tsp. salt
a dash of cinnamon
**Note, all these spices can be altered for your liking, so I added more spice, more cumin, and more salt, because that's how I like it. I also used a small piece of cinnamon bark instead of actual cinnamon**

 In a large soup pan, heat the butter on medium-heat, and then toss in the onions and saute them for about 5 minutes until they're soft. Then add in the garlic, and spices. Saute until fragrant, about a minute more.

Then add in spinach, and mix in until it's wilted down. Add in the yogurt and dash of cream. Mix well, allow it to cook for about 3-4 minutes. If it's too dry, add in more cream or yogurt. Then add in the splash of lemon juice and mix. Try it, if it needs more salt, add it, or if it needs more spice, go for it. Go by taste. When it's done, toss in the pan-fried paneer (the cheese), and serve with roti, naan, or over rice.

Optional additions: you can add in a tbsp. of tomato paste to add extra flavor, or fresh tomatoes. You can also top with cilantro, and lime slices.
Odd picture, but quite good!

Monday, March 5, 2012

Nigh Kayaking and Pecan Pina Colada Oats

So for the past few weeks, Tyler has been going kayaking/boating with our friend Raleigh. He'd always come back desperately tired, but full of smiles and stories of how many times he rolled over in his boat in the water, or how he went down a rapid upside down...my thoughts were always...yes, fun. Upside down in water stuck in a boat? My idea of a good time.

Now, sarcasm is difficult to determine in writing, but that was definitely sarcasm. I was baffled by his general excitement about the boating situation. Until yesterday. Yes my friends, I did it, I went boating on the San Marcos River. And it was AWESOME.

Basically, you put on a swim suit, and then proceed to add on three layers of safety gear so that fools such as myself do not drown when they flip over multiple times. Oh...and flip over I did. Twice on purpose to get me used to the feeling of being upside down in the water, trapped in a boat, and confused. Banging on the side of my boat for someone (Raleigh) to flip me up. Oh the joys.

Then...about four times not one purpose.

Time 1: Going down a mini-rapid (which in my head was honestly a class 5 or 6, yes a new category of rapid for this monstrosity). This was fine, I got flipped up, and was only mildly disoriented.

Time 2: Trying to get my boat back into the water. I got it back in part way, proclaimed "VICTORY IS MI--" and flipped over.

Time 3: Once again getting my boat into the water. This time I had it for a solid 15 seconds, before I flipped. I believe Raleigh cursed and paddled towards me to flip my sorry butt up right again.

Time 4: The epic time. I was trying to get into a current and then back out successfully...but unfortunately, as soon as I managed to get into the current, I got excited like a small puppy and forgot to paddle out. Yes, I have now learned paddling is important. Instead, I went down another rapid, backwards mind you, and then flipped over. This time, I didn't have a moment to breath in, so I was out of breath and under water. Of course, the best thing to do when you're underwater right below a rapid is to open your mouth. Yep, I did that. Yep, 3-4 giant mouthfuls of water were shoved down my throat and trachea. When Raleigh came over to once again flip me over, I proceeded to cough up a good deal of water, and then a large amount of the spinach ravioli I had for dinner.

Food for fishies! Yeah, it was pleasant. But the amazing thing, was all the while, Raleigh was totally calm! She was like, "Okay, you're going to go down that rapid backwards" or "Okay, you threw up in the river" or "Okay, let's flip you up for the...fifth time..." It was awesome, and I felt totally comfortable going out there again with her and Tyler.

Moral of the story: If you haven't gone kayaking, do it! It's fun, you might throw up, but just look at it as giving back to the fishies, for using their home space to play/flip over in. And also, when someone asks you, "Do you want to learn to flip yourself upright?" Always say yes. Always.

On to food. Specifically breakfast. So I'm not a huge breakfast poster...or even a huge breakfast fan. Someone people love it, some people hate it, I'm ambivalent.

But, I do recognize that it's healthy and therefore compel myself to eat it. One thing I've found that I really love is steel cut oats.

What are steel-cut oats you ask?
Steel-cut oats are whole grain groats (the inner portion of the oat kernel) which have been cut into pieces. They are commonly used in Scotland and Ireland to make porridge, whereas rolled oats are used in England, other English-speaking countries, and Scandinavia. They are sometimes named after the grade of cut, e.g. pinhead oats; steel-cut oats from Ireland are sometimes called Irish oats.

Taken straight from Wikipedia. What I know about them is that they have quite a low glycemic index, so they are healthier for your since they don't spike your blood sugar as much. Also, they are super easy to make, and tasty. Also, they're gluten free!

I've made tons of variations on this, but Pecan Pina Colada is latest creation, and I like it! So I figured I'd share. They are pretty malleable, so you can change the amount of the ingredients depending on what you like (sour cherries fan? Sure, toss 'em in! Hate coconut? Omit it!)

You can make these oats at the beginning of the week, and have them for breakfast every day with some greek yogurt and lemon curd or jam, or even a small bit of nutella. That's what I do :-)

Pecan Pina Colada Oats


1:2 steel cut oats to water (1 cup oats, 2 cups water)
0.25 cup unsweetened coconut flakes (or sweetened if that's what you have)
1.5 handfuls of pecans, whole or coarsely chopped
2 dried, sweetened pineapple rings, coarsely chopped

Optional but tasty:
A few table spoons of brown sugar     OR
A big dollop of honey         OR
3-4 tbsp. coconut milk         OR
1 tbsp. Butter                    

Heat your oven to about 275F

In a 9x9 pan, mix all the ingredients together. Put it in the oven for 20 minutes. Check on it, if it needs more water, add it. Should be done after another 20 minutes depending on how crunchy you like your oats. Allow them to cool, cover with foil, and stick in the fridge for the week!