Showing posts with label Breads. Show all posts

Saturday, January 23, 2016

Tea Biscuits

My parents, like many Indian people, make tea every day, and we have nasta (nah-s-thah) which are Indian snacks, and invariably some kind of biscuit or what other people call cookies. They weren't very fancy, but they were delicious with the tea -- particularly Parle-G glucose biscuits. Sounds odd, tastes delicious. Tyler would go through packets of these when my dad first introduced him to them. Needless to say, I don't keep them in the house much.

But I recently had some tea from a pre-mixed indian tea-tea spice that I use, and had a hankering for some biscuits. So I went back to the basics, equal weight butter and flour with a pinch of salt, and any flavoring you want.

So far I've done parmesan cheese and black peppers, chipotle pepper with habaƱero cheese, and vanilla scented-vanilla glazed. They are simple, and go really well with your cup of tea. Make them, keep them around.

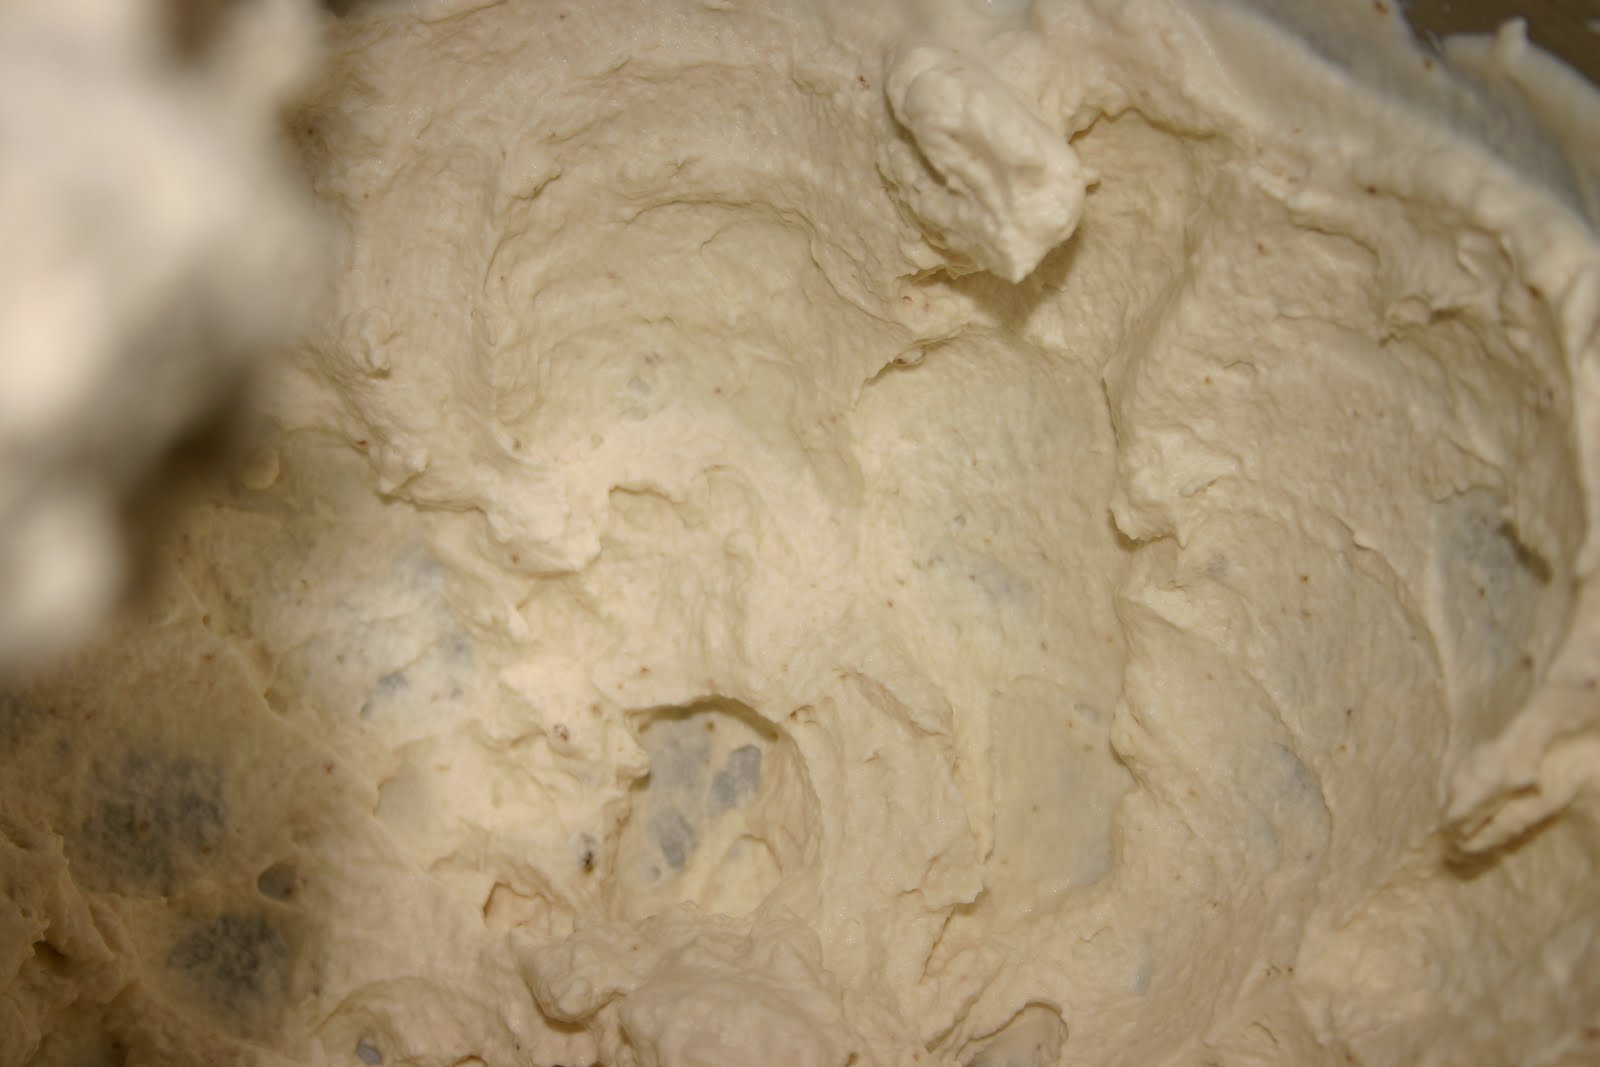
The parmesan and black pepper dough that I rolled out between two pieces of parchment paper
Chipotle Habanero Cheese biscuits (and one parm/black pepper bunny biscuit!)
Vanilla glazed, vanilla scented biscuits (these were awesome)
Basic Biscuit
from Paul Hollywood's recipe

75 g (0.75 cup flour)
75 g butter
pinch of salt
A little cold water
Whatever flavoring you want to add (vanilla bean seeds, almond, some sugar, parmesan, fennel seeds, poppy seeds, go crazy!)

With your hand, or more easily in the bowl of a food processor, mix together the butter and flour and salt until it resembles coarse sand. Then add in your flavoring choice, start the food processor, and slowly add a little water until the whole thing just comes together. Dump the contents onto cling wrap, flatten it into a disc, and place in the fridge for 30 min - 1 hr.

Turn on oven to 375F

Then roll it out on a floured surface or my favorite, in between two pieces of parchment paper so your counter doesn't get messy. You don't want to handle the dough too much or the butter will melt, and you'll get mediocre biscuits. After you roll it out, if it feels too warm, just pop the whole thing back into the fridge for another 10 minutes, then you can either cut it into squares, use shape cutters, etc. to make your biscuits. Put them on a tray lined with parchment paper or silpat. Put them in the oven for ~10-18 minutes (check to make sure they are not getting too brown based on the size you cut them). Pull them out, and allow them to cool before icing or just eating! 

Thursday, September 10, 2015

Camping and Camping Food


One of my goals for this summer is accomplished -- camping! We went to Otter River State Forest near Sterling, MA on a Friday. It was definitely the most "organized" camp site I've been on, with a lot of spots, pretty close together...so if you're looking to "rough it" this is definitely not the spot to go. But they allow pets, the sites and reasonably sized (fit a four person tent, a car, a fire pit, and a picnic table), and there's swimming...though we didn't partake in that particular joy because it was a bit too crowded for my taste. I'd definitely recommend it for a weekend getaway for someone who is interested in camping/getting away but doesn't want to go somewhere too remote.  

Our tent
Circle of trees
That view
Either way, it was pretty fun. Friday we got there and made an awesome dinner with our camp stove of cilantro tofu with cheese and Arriabata sauce from TJs. We took our big dog with us and made our lives much easier by investing in a spiral pet stake, which we put in the ground first thing, hooked Rain up to it, and let her have "free" run of the site. Next day we got up early, made coffee with our aeropress, packed up our stuff, and hiked up Mt. Wachusetts. All in all a medium hike, definitely possible for beginning hikers.
of puppies and more puppies
I recently invested in hiking shoes, and they made a world of a difference in my hiking. My feet hurt less at the end of the day, my ankles didn't roll as much and as such hurt much less, and I was way more stable walking which is super important. Anyways, it was beautiful up at the top, and my favorite aspect was the windmill "farm." They have two windmills near the top of the mountain, and you can get pretty close to them. The quiet coupled with just the sound of the windmill is pretty awesome.
windmills!
Then the piece de resistance, pizza. We made campfire pizza. Easy, peasy, lemon squeezy. Trader Joes pre-made pizza dough, arriabata sauce, some peppers, some pickles (we had leftover pickles so I thought, why not?!) and some cheese. Man alive was that pizza good. 

For the pizza dough, we floured it, and then cut it into four parts, so that our pizzas would be small and thin, and we rolled them out as thin as we could.
Trader Joes Pizza Dough

1/4 of the dough rolled out thin
We used our cast-iron skillet, coated in some oil, heated it over the campfire, and when it was hot, we put the pizza dough on it to cook and removed the cast iron from the heat (the residual heat will cook the pizza)
cast iron skillet heating on the fire
It's cooking
Flip it a few times
After the dough was mostly cooked, we topped it with pizza sauce, cheese, and toppings (light on the sauce so you don't get a super soggy pizza), and finished it on the stove top. You can definitely finish it on the fire if you want, you'll just have to watch it carefully to make sure it doesn't burn. 

Toppings!
Add caption

Finishing it on the fire

Puppy wanting food!
Finished product!
Bottom of the pizza!
Full and happy bellies!
Super fun, I'd definitely recommend it for your next trip, and if you don't have a cast iron pan, I'd recommend investing in one -- it's one of my few kitchen must-haves because it's so versatile! 

Summer Goal 2015: Camping at least once, ACCOMPLISHED!

Sunday, September 14, 2014

Brunch Time! Easy Vanilla-Almond Baked French Toast

It's been a struggle to sit still recently and just enjoy the moment. Most doctors tell me, "Enjoy medical school, you'll never get the time off that you do then!" but then I everywhere I turn, friends are publishing papers and going to conferences, getting involved with all kinds of research, and I'm...petting my new puppy. Not to say that petting my new puppy isn't amazing, but it does leave one wondering, "Should I be doing all that?"

Those who know me know that I tend to obsess. It's a double edge sword really: if I need to sit down and study, I will sit down and study for 14 hours straight; if I lose something, I'll spend a hour and a half searching for it, and if I get concerned about whether or not I need to be doing something with my career/academics, I'll sit there and mentally chew on it for days until I'm out of my mind with nervousness and I internally implode and finally calm down.

Healthy, no?

Well, I'm a lot better than I used to be with the latter two. I don't really have an hour and a half to search for stuff now, and really what good does it do me to sit there and  constantly stress about whether or not I'm doing the "right thing" for my career?

So I just try not to. I'm not super successful, but when I catch myself careening over the edge of "what about research? Ahh! What if I don't get a residency? AHH! should I be going in after hours and shadowing?? AHH!" I just stop myself, take a deep breath, and eat a damn cookie. It's all gonna be okay, and I'm pretty happy. That, my friend, is a lot right there.

Speaking of happy, this french toast makes me happy because it's so unbelievably easy.  I found this recipe on one of my favorite blogs under the "Pretty. Easy." heading, and it definitely looked anything BUT easy.
 

It wasn't a lie though, it's crazy easy, and people come over and are all, "You made that?!" and you're all, "Yeah" in a bashful yet subtly cocky way. That's right, subtle cockiness will get you far. Fair warning, it's an overnight recipe, which can throw people off for the easiness factor, but trust me, it's easy. I've said easy about 8 times here, EASY.

Try it, you won't be disappointed.
Easy Vanilla-Almond Baked French Toast
Adapted from Pairs Well With Food

1 Loaf Challah Bread, sliced into 1 inch thick slices and laid out to dry for 30 min to an hour (honestly, I skip this step most of the time)
4 large eggs
2 egg whites
1.75 unsweetened vanilla almond milk (or regular)
1 tsp almond extract
1 tsp vanilla extract
0.5 tsp kosher salt
5 tbsp sugar
2 tbsp unsalted butter
1.5 cups sliced almonds
Maple syrup for serving

The night before
Put your bread in a pan for the overnight soak. Mix together the eggs, egg whites, vanilla almond milk, vanilla extract, almond extract and 3 tbsp sugar. Pour it on the bread, make sure it coats the bread evenly. Cover it, and stick it in the fridge overnight. If you're pushing it, you can soak for as short as 30 minutes and it's still delicious.

The day of
Preheat oven to 400F. Pull out your soaked bread. Line another baking dish (the one you'll bake the bread in) with parchment paper/butter the dish (<--what the butter in the recipe was for)/whatever you do to get things not to stick. On a plate, pour out your sliced almonds. Take one slice of the soaked bread, let the liquid drip off of it, and then coat one side of it with sliced almonds, and place it on your baking dish. Do this with all your bread.

Tip: I usually put the pieces of bread down into the baking dish first, then I put the sliced almonds on by hand, gently pressing them down to get them to stick.

Take the 2 leftover tbsp. of sugar and sprinkle them over the top of french toast. Bake for ~20 minutes. Serve hot with maple syrup!


Friday, May 25, 2012

Peach Toast

It's been a while, I know. Things have been hectic over here. We are getting ready to move, so we're selling ALL of our furniture (moving to Texas? Need some furniture? I'm selling it all for $250), making plans for our 3 week stay in Paris (!!!), contacting real estate agents in Boston to search for apartments. Overall craziness in the Shah-Hoppenfeld household. 

So hectic in fact, that I actually forgot to go grocery shopping last week. Well, not really forgot. It was a mixture of laziness and the epiphany that we will actually have to eat all the food in our pantry before we leave in about 2 weeks. So I've been trying to get a little...creative. Hence--peach toast! 


Usually for lunch Tyler and I have a sandwich, and we end up with the ends of the bread. I've used these for a few different things--bread crumbs, croutons, but my new favorite is breakfast peach toast. Sometimes the best things in life are simple. Toasted bread, butter, sliced peaches, and a sprinkling of sugar. The toast has been a nice reminder of simplicity that can be pretty, and tasty.


Peach Toast


Slice of Bread 
Square of butter
Fresh, ripe peach, sliced
1 tsp. white or brown sugar. 


Toast the bread in your broiler or toaster. Then spread the butter on the bread and toast for a little while longer. Then place the sliced peach on top of the toast, and sprinkle the sugar on top and viola! Pan avec peaches :-) (Frenglish) 

Saturday, August 27, 2011

The Generosity of Others

The generosity of others always makes me smile. Today, I was on my knees, scrubbing the bathroom floor with Tilex when I heard the doorbell. And poof, five minutes later, I was sitting down with some coffee, taking a much needed break, and munching on a cupcake topped with the most beautiful sprinkles I had ever seen.
 It's amazing how a small thing can take you from complaining about how much hair you shed, much like a sheepdog in fact, to smiling happily as you lick off buttercream. I have always thought food can make someone's day significantly better, but I'm not sure why. If someone I love is upset, my first thought is to make a cake, or cookies, or sweet-bars, something, anything, that could make them smile.


It's a big part of why I give away most of the things I bake. That look of relief that people get when you bring brownies to school and they have something special to look forward too at lunch. The surprise on someone's face when they open the door and you've got a big plate of homemade pretzel bites, still warm from the oven. Or the slow smile that forms when your neighbor asks you, "what did you bring this time?" Adding that small amount of joy to someone's day is priceless.
I am trying to lead a more minimalist, giving life. Not buying things I don't really need, giving away things I don't use any more, and giving a portion of what I make to charities. The first two, because my mother instilled those values in me--think three times if you're going to buy something, it could just crowd your house, and look at something and really think if you use it, or...well, it will just crowd up your house.

The last part comes from a lot of self-reflection...but it's a simple conclusion: I can afford it. I can save 100 a month and give it to charity. Money can make a huge difference to charities like the Human Rights Campaign, Nothing but Nets, or Plan India, so why not? Makes me feel good, and they need it.


Anyways, this was not meant to be preachy, just when my neighbor came over with those cupcakes, well, I had some time to self-reflect while I was munching on one.

So, even a small amount of giving--cookies to your neighbor, cupcakes to your co-workers, or hey, a dollar to the homeless guy on the corner because heck, it's 109 degrees outside, it'll make you smile, so try!

Maybe try with these pretzel bites...which are AMAZING. They taste like the kind you get in the mall. Except healthier, since they're half whole wheat flour!

Pretzel Bites
Adapted from What's Gaby Cookie

2.5 tsp active dry-yeast
1.5 cups warm water
2.5 tbsp. brown sugar
2.5 cups all-purpose-flour
2 cups whole wheat flour
Vegetable Oil for the bowl
0.67 cup baking soda
5 tbsp. melted butter
2.5 tsp salt
kosher salt for garnishing
1 egg yolk for a wash

In a mixing bowl fitted with a dough hook mix the warm water, the brown sugar, and yeast. Let it sit for five minutes until its bubbly. Then add the salt and melted butter and mix. Turn on the machine, and while the dough hook is rotating, add the all purpose flour, and then add the wheat flour until it forms a huge mass. Then take it out and transfer it to a bowl coated with the vegetable oil, and cover that up with a cloth...let it rise for an hour.

Then preheat the oven to 425, and split the dough into 8 different parts. Roll each part into 14 inch ropes, and cut it into 1 inch pieces.

Then boil 10 cups of water in a large pot. Then add in the baking soda...it will bubble up as baking soda tends to do, so be ready for a little spillage. Toss in about 15-20 pieces at a time with a slotted spoon, and then after about 20 second, or when they float to the top, pull them out and put them on napkins to drain.

Then put them on a parchment-paper lined baking sheet. Brush with a the egg yolk, mixed with a little water, and the sprinkle with salt. Pop them in the oven and bake for 10 minutes or until golden brown on top.

Pop them out of the oven and eat them when they're warm with some mustard! :-) 

Friday, June 24, 2011

Tomatoes from the garden, mini-pizzas, and a mango smoothie

My parents planted a lovely garden in our backyard with okra, tomatoes, mini-yellow tomatoes that are shaped like bells, cherry tomatoes, yellow squash, green bell peppers, eggplant, spicy peppers, and basil. It's lovely, especially the tomatoes. 


Aren't they lovely? 

Anyways, so I made pizza dough. It was good. Then I made mini-pizzas, and a smoothie, they were really good. 

I like to keep pizza dough in the fridge/freezer, it's easy to pull out, defrost, bake up, and make pizza. It sounds complicated, but it's really not. One recipe can make four pizzas. Make one, and freeze three. 

And the better part is making mini-pizzas! 

So I'll tell you how: 

Pizza Dough

**3.5 cups all purpose flour
**1 cup whole wheat flour 
1.75 tsp. salt
1 tsp. active, dry yeast
0.25 cup olive oil
1.75 luke warm water
Cornmeal (optional)

**You can mess with the amounts of whole wheat to APF, you can make it all APF, or half and half, I will say, half and half will change the flavor a great deal**

In a small bowl, mix together the warm water and yeast. Make sure the water is only luke warm, you don't want to kill the yeast. Let it sit for 2 minutes. 

In a separate bowl, mix together the flour, salt, olive oil, and then finally the yeast. Knead together for 5-7 min, or basically until sticky but not wet. 

Divide it into four separate balls. So now the dough is basically done. So you have a few options:

1. Use it right away? Let it rise, in a covered bowl, in a warm spot, for 2 hours. It should double in size. 

2. Use it in the next 2-3 days? Keep it in the fridge wrapped up in plastic wrap. Before you use it, pull it out, and let it rise for 2 hours in a warm spot.

3. Use it in the next month? Freeze it in plastic wrap. Defrost it in the fridge the night before you want to use it. Pull it out and let it rise for 1 hour, and use it.  

How to Bake Them:

While it's going, preheat your oven to 450F. If you have a pizza stone, put it in there 45 minutes before you bake on it. If not, you can bake on a regular round baking pan. Roll it out or stretch it out to the size you want. Dust your pan with cornmeal, and place the dough on top. Bake the dough for 8-10 minutes. Then pull out, put your favorite sauce on top, and your favorite toppings, and bake for another 6-8 minutes. 

Anyways, what I did was I made tasty mini-pizzas for lunch. I used one dough ball, and pulled it apart into tiny rolls, and rolled it out into tiny pizzas. Baked them for 10 min, then put the toppings on top, bake for another 5-6 min. 

My dad's hand in the corner grabbing at them!

Om nom nom

Then I made a mango protein smoothie! Seriously, it didn't taste like a protein smoothie, it was awesome! The protein helps keep you filled up throughout the day, and it tasted great! 

Mango Smoothie
1 cup milk (soy, almond, whole, 1%, 2% whatever you like)
1 mango, peeled and pitted
1 apple, seeds removed
0.5-1 scoops of protein powder (depends on what you want) 
0.5 cup yogurt (I used Activia vanilla yogurt) 
Ice cubes 

Blend it all together, and pour it out! :-) It's tasty, it's filling, and it goes well with the pizzas. 

Blurry but tasty!


Sunday, May 15, 2011

Austin

I really love San Antonio. With it's vibrant hispanic roots, the riverwalk dotted with all kinds of restaurants, and it's suburban neighborhoods with each house being architecturally unique. It's a great city.


But Austin definitely has an appeal to it. A college town, the carefree feeling of youth is infectious and pervasive. T and I went to visit two friends, R- and Mi-, and they live near 6th street. For those of you not from around here, 6th street in Austin is like...well, a mini-version of downtown Boston. It's right near the capitol building (which is in fact bigger than the actual Capitol), has lots of shops, restaurants, bars, ice cream places, pizza being sold out of the back of a car, and really anything else your little heart could desire. It is also near UT Austin, so there is a constant stream of patrons.

Some of the organic veggies we got from the farmers market
Anyways, our friends showed us around 6th street, and we had a wonderful night on the town, where I discovered that a "Blue Wave" involves getting water thrown on you, I saw a woman spit fire from her mouth, and a street covered in people that was ostensibly meant for cars. Overall, a fun experience!

The next day though, was cooking day! Bread Master Man made AWESOME pizza dough (I am a bit sad I forgot to get the recipe), Tiny Cooking Monster made these amazing caramelized onions, and yours truly made peach short cake! T- provided interesting conversation and had the difficult job of sitting on his tush tush :-)  If you are jealous right now, you should be, because we got to eat all of this.
hello handsome

I must say, there is very little better than the tartness of peaches, mixed with brown sugar, cream, browned butter, on to of homemade biscuits, and topped with brown sugar whipped cream.

Can you tell I'm on a brown sugar kick?


Making your own brown sugar is surprisingly not hard, and quite gratifying. I learned it from this blog, and decided to try it. Result: success. 1 cup sugar + 1 tbsp molasses = brown sugar!


Anyways, on to the tasty goodness

Peach Short Cake with Browned Butter and Brown Sugar Whipped Cream

Start by making biscuits. I added a table spoon extra brown sugar into this recipe to make it sweeter for the shortcake. You can put them on some parchment paper, and keep them in the fridge until you're ready to bake them. 

Peach Filling
3-4 ripe peaches
4 tbsp. brown sugar
0.25 tsp salt
1 tsp. vanilla extract
1/3 cup half and half 
4 tbsp. butter
2 tbsp brown sugar
Water

Cut the peaches into small cubes. Mix them together with the brown sugar and salt. Add in the half and half and vanilla, and then add a little bit of water so the peaches are partially covered. 
Stick them in the fridge for at least half an hour.


While this is going, heat up some butter in a medium saucepan over medium heat. Cook the butter until it's brown, you'll hear it crackle, that's it boiling off the water, you'll some foam form at the top, that just some of the milk fats. It should take about 3-4 minutes only for the butter to take on a carmel color. The taste is seriously indescribable. 

Anyways, take that off the heat and let it cool. You can keep that aside until you're ready to cook the peaches. 

When you are ready though, heat the butter up again, and put in the 2 tbsp. brown sugar. As that is heating up, strain the liquid off of your refrigerated peaches. Then add these peaches in to the pan and cook them for about 5-7 minutes on medium to low heat (depending on how soft you want them). 

While these are going, you can make your whipped cream! 


Brown Sugar Whipped Cream
3/4 cup heavy whipping cream
3 tbsp. brown sugar

You can do this by hand or in an electric mixer. In an electric mixer, put on the whisk attachment, and add in the whipping cream. Turn it to 6-8 (fast), and whip it. After about a minute or so, you should see small peaks forming, and then add in your brown sugar. Keep going until stiff peaks form, and then you're done! Keep it in the fridge till you're ready to use it. 

If you're doing this by hand it's basically the same thing, just use a whisk and a bowl.

Anyways, now you're ready to put it all together.

Tasty

Open up a biscuits, top it with some peaches and pour some of the browned butter mixture on top, then a dollop of whipped cream, and you're set.


It's tasty! 

Anyways, I am quite happy that we visited Austin and got to spend some time with our buddies who also make tasty food.  

So to sum up -- if you haven't visited Austin, TX -- do it. It's awesome. And, if you haven't made peach short cake, do it. It's awesome.  

Friday, April 15, 2011

Tasty Breakfast


Biscuits with poached eggs over beet greens

So, Saturday morning is arguably my favorite time of the week. I can wake up leisurely without an alarm...T- and I can peacefully make breakfast that usually includes coffee and omlettes. But last weekend I decided to indulge. I got up and made buttermilk biscuits and poached an egg over beet greens.

If you've never had beat greens, they are absolutely delicious. T- and I are apart of a CSA (Community Supported Agriculture) and they have been providing us with seriously tasty organic veggies. Recently we've been getting beets, and attached to them are their greens. I was about to throw them away when T- judiciously suggested I save them, and we could could them up like kale or chard or spinach.

So as my biscuits were cooking up, chopped up the beet greens cracked two eggs on top and steamed the whole thing. Two words: flipping awesome. The beet greens had a subtle flavor...they weren't bitter or stringy, just soft and flavorful...but I can't really describe the flavor.

Super delicious, super healthy -- especially with the biscuits (which are great with some butter and brown sugar). 


Buttermilk Biscuits (modified from Alton Brown)

2 cups of flour
4 tsp. baking powder
0.25 tsp baking soda
0.75 tsp. salt
1 tbsp. brown sugar
2 tbsp. butter, cold
2 tbsp. shortening
1 cup buttermilk

Preheat oven, 450

Whisk together the dry ingredients. Cut in the butter and the shortening. Make sure that the butter is chilled. Mix it in with your hands -- it'll make it easier to make it into crumbly pieces. Pour in the buttermilk in the middle of the flour mixture and stir it together into until it forms a sticky ball.

Pull the dough ball out onto a floured surface, and spread it out into a 1 in. round. Use either a biscuit cutter or a glass to cut out biscuits shapes. Bake for 15 - 20 min.

Greens with Eggs

Any greens you have (kale, chard, beet greens etc) 
1 clove garlic
0.25 part of medium red onions
2 eggs 

Wash and cut up the greens. It can be any greens really...I'm not sure how spinach would do, but I know kale, chard, and beet greens turn out great. In a medium saute pan, saute up the garlic and onions with some olive oil (you don't need to do this if you don't like garlic and onions). After they turn clear-ish, toss in the greens, and turn down the heat to medium-heat. Add a tablespoon or two of water and cover the greens. 

Cook them for about three minutes. After that crack two eggs on top and cover them again. Cook until the yellows of the eggs are fully cooked, or as cooked as you want them. 

You can just pour it out on a plate, and add a biscuit...perfect breakfast! 

Enjoy! 


Sunday, March 20, 2011

Spring Break + Chocolate Scones!

March 14th - March 18th -- Spring Break 2011. This may conjure up images of drunken beach parties, beach volleyball, uncommitted spring-flings, and overall tom-foolery. Now, picture it my way: best friends, Franzia, books upon books, no grading, no lesson planning, and lots of sleeping. Oh yeah, and a beach :-)

Spring Break 2011 marks another new and fantastic part of adulthood: Vacation with friends! T-, S- (the BFF), and I rented out a beach house in TX and spent the week there. The beach house was fantastic! It had a kitchen, living room, bathroom, two bedrooms, and an AMAZING view of the ocean. For the most part we just chilled -- either in the house, or on the beach with T- fully covered hoping desperately to not expose his unpigmented skin to the sun, S- doing the opposite hoping to get tanned, and me well, getting my butt sunburned. Literally, my tush-tush, and it hurts to burn your butt. I finished reading the Lisabeth Salander book series (the girl with the dragon tattoo, etc) which is FANTASTIC. If you haven't gotten it, GET IT. You will not be able to put it down. Seriously, it's a mystery/thriller page turner. They better making a kick-ass movie out of it. Anyways, the vacation was much needed and nice: we played, laid on the beach, read books, baked, and met someone named Ned. Overall: successful vacation. I'm sad to see it end.

Looks like I'm lesson planning? Nope. www.freetetris.org

Besties on the beach :-) 

Jacques!

First night! After a 12 hour drive for S-...

Magnificent dinner of homemade pizza, garlic bread, and salad!


But! We did make chocolate scones (modified from joyofbaking.com). These scones turned out amazingly...and are excellent to-go snacks or quick morning breakfasts as you're running out the door. They're not super sweet, and the powdered sugar on top makes them prettier and adds a little extra sugary-ness. Excellent with coffee/tea :-)
Chocolate Scones

Ingredients
0.67 cup heavy whipping cream 
1 large egg
1 tsp. vanilla extract
1.75 cup all purpose flour
0.25 cup unsweetened cocoa powder
2.5 baking powder
0.25 tsp salt
0.33 cup unsalted butter (cubed)

Scone Glaze
1 egg beaten
1 tbsp heavy whipping cream
More chocolate scones!

Preheat oven to 375.

Whisk together heavy whipping cream, egg, and vanilla extract. Then set aside

In a separate bowl, mix together the flour, cocoa powder, baking powder, and salt. Cut in the unsalted butter. Honestly -- it works best if it you use your hands to cut in the butter.

Then slowly mix in all the wet stuff and mix dough into a ball. Then knead dough gently a few times to glutenize the flour.

After that, flatten the dough into a flat, thick (2-3'') disc. Cut it into triangles (6-8 depending on how big you want your scones, I do 8).

Then beat together the scone glazing and brush it on top of the unbaked scones, and pop them in the oven for 15 min.

After they come out, wait till they cool and then dust them with powdered sugar!

Tasty goodness :-)