Showing posts with label How To. Show all posts

Saturday, August 22, 2015

This. Almond. Tart.


I just finished eating a slice. It is so good. Simple, not too sweet, not overwhelming. Just the cookie-like crust, the slight tang of the jam and the wonderful flavor of the almonds. My words of advice: if you don't have almond meal, you can make it easily by pulsing whole almonds in a food processor. Pulse them because you want almond meal, not almond butter. Please don't skip out on the layer of jam on the crust, it add to the flavor. Pick a jam that isn't too sweet and has a little tang...it'll go a long way. I'd go with apricot, or sour cherry. Enough with the words, on to the recipe.


Almond Tart 
Slightly mdified from Cooking with Manuela

Tart Crust

2 egg yellows (save the whites for the filling)
0.33 cups sugar
1 tsp vanilla
2 tbsp milk / heavy cream (I used heavy cream)
1.5 sticks butter, cubed
2 cups all purpose flour
pinch of salt

Preheat oven to 375F.

In a food processor or with a hand mixer or even in a stand mixer, beat the egg yellows and sugar together until well combined. Then add the vanilla, heavy cream/milk, salt, and mix. Then beat in the butter until it's mixed thoroughly with the liquid (it doesn't have to be smooth, just mixed). Then, mix the flour in a 1/2 cup until it comes together. Since this is a tart dough, it'll be wetter than usual crust, and that's okay. Transfer the dough into a pre-buttered and floured tart part, sprinkle a little flour on top of the dough, and press it out thinly into the pan. You want the tart crust to be thinly spread because it will rise, so you can peel off any excess. Poke holes in the base with fork tines so that no bubbles form during the baking process and put it in a 375F oven for 20 minutes.

While it's baking you can make the filling:

Filling
0.25 cup jam (tart and sweet, but not too sweet -- apricot, blackberry, cherry. I used a jam from my friend Laurie over at Laurie's Little Kitchen)
5 egg whites
0.33 cups sugar
2 cups almond meal
Slivered almonds for topping

You can either buy the almond meal or make it yourself (see above text prior to recipe). Beat the egg whites to stiff peaks. Add in regular white granulated sugar, and fold it in by hand. Then add in the almond meal, and fold in well. You'll see the egg whites deflate a little, but that's okay, just make sure you're folding, rather than stirring the stuff in.

Now...to assemble the tart! After the shell comes out of the oven, turn your oven down to 350F. Pour the jam filling into the tart and spread it out, creating a thin layer. Then pour the filling into the tart and spread it out with a spatula/spoon. Top with silvered almonds. Bake for 20-25 minutes, until the top is slightly brown.
Jam!
Pre-baking
Pull out, let cool, and serve with powdered sugar dusted on top, or by itself.

So good

Immediately post-baking


Thursday, May 3, 2012

How To: Learning a New Language

As I have mentioned a few times, Tyler and I will be going to France this summer! So, we decided to try and learn French, in part because I think it would be fun to learn a new language together, and in part because it's respectful to the country and culture we're visiting.

I knew when we started that we would not be fluent by the time we go to France, definitely far from it, but I hoped we'd know enough French to get around and have basic conversation. To this end, we found a French tutor on craigslist, and got started!

Our first French tutor was...well, not good. So we hired another one, and she is great! Bi-weekly, we practice our French conversations and pronunciations with her, and it's been well worth every dollar spent. But, she also suggested that we get an audio-tutor to listen to the French language and learn more daily. In particular, she suggested the Pimsleur Language Program, a set of audio CDs that we could get for free from our local library, and listen to in our cars, while walking the dog, etc.

If you are interested in learning a new language, but you want to hire a tutor, I'm telling you--this is the way to do it. These Pimsleur programs are around 30 minutes each, and they teaching you starting at the very basic level, provide you oral practice each lesson, and build up slowly, lesson by lesson.

I got the French CDs from the library, starting with French 1A, and I've already learned so much! I'm only on lesson 8 right now, but I can have a basic French conversation (albeit, a conversation about how you are, where you want to eat, when you want to eat, what you want to eat, etc.) and it's quite exciting.

So, my suggestion--if you want to learn a new language, check out these Pimsleur CDs from your library. You can even rip them onto your computer and upload them to your iPod/iPhone. 

Saturday, November 12, 2011

How To Make...Bath Bombs

First off, fear not. I have not left the foodie-world. I am still baking, cooking up a storm, etc. In fact, I made these tasty Millet Muffins from Heidi Swanson's cookbook, Supernatural Everyday. I don't usually buy cookbooks, but this one is quite excellent. Sooner or later, I'm going to have to post my variation on her quinoa cakes. 


Anyways, since the holiday season is coming up, I have forayed into the homemade gift world, and I love to share my success (less so my failures for obvious reasons). These homemade bath bombs are a definite success. 


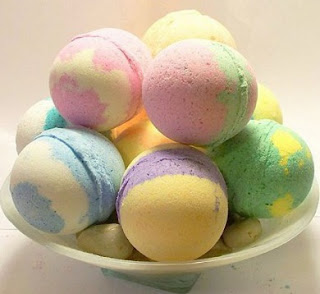
Totally not mine. Picture pulled from the web, but that's what
they look like from the store usually.
What are bath bombs? They are those balls that you buy in the store, and you toss into your tub...they fizz, add moisturizer, nice smell, and generally relaxation-ness to your experience. They're quite wonderful...and exorbitantly expensive. Fret not! They're super easy to make at home. 


Here are mine, I didn't want to add any coloring, so they're plain white, but you're welcome to color yours. 


Bath Bomb Recipe
Adapted from petitelefant.com


0.5 cup corn starch
0.5 cup Epsom salts [get it at your regular grocery store]
1 cup baking soda
0.5 cup citric acid [get it online, or I bought mine at Whole Foods]
0.75 tbsp. water
3 tbsp. olive oil
Essential Oil [totally optional, but it adds a nice smell. Get it at Whole Foods]
Small ice cream scoop, shot glass, or something to shape the bombs


First, grind up the Epsom salts super fine. I used a blender, you can use the back of a large spoon, mortar and pestle, or whatever you have to grind something up. 


Mix all the dry ingredients in a large bowl (corn starch, salts, baking soda, and acid). 


In a separate bowl mix the wet ingredients (water, olive oil, and essential oil). Yep, has to be in a separate bowl because when you add water to the dry ingredients, the baking soda, a base, reacts readily with the citric acid, obviously and acid. Anyways, mix the wet ingredients together nicely. Then quickly add it to the dry ingredients. 


Mix the whole sha-bang together with a whisk or your hands (we used hands), until it's the consistency of slightly wet sand. 


Fill up whatever you're using to shape the bath bombs, and it down hard. I used an espresso cup, filled it up, and pushed down with my finger tips. Then flip it upside down on a cookie sheet, or wherever you want to put the bombs, tap the back with your hand hard, and viola out it'll come! 


If it falls apart, don't worry, just put it back into the bowl and try again. 


Let these suckers dry overnight, and you'll have some lovely bath bombs! Try them in a tub, or pack them individually in saran wrap and then put them in a cellophane bag with the pretty ribbon and you have a lovely gift! 


PS -- anyone on my gift-giving list, you're totally getting these! 

Sunday, November 6, 2011

How To Make...Homemade Holiday Cards

It's always made me a little bit sad that we don't receive as much as people did "in the old days." Now it's just bills, ads, and the occasional notice of some kind. That's part of what holidays and birthdays so special...checking the mail to see that, lo and behold, people that you don't necessarily see everyday love you, and took the time to write words for you, put a stamp on an envelope and stick a card in the mailbox.


I love getting cards, so I send them. I try to remember the birthday/anniversary/big event of everyone close to me and send them a card, because I know I love it, so I am presumptuous enough to think they do too.

I'm not a genius of course, I use this site to help me remember these things, and it works wonderfully.

Anyways, if you're thinking of sending holiday cards this season, consider making them at home for a few reasons:

1. While there is an initial investment, it's cheaper overall.

2. It adds a bit of a personal touch to your cards, which is always nice to see. Plus, they're unique!

3. It's fun--get your girlfriends, or force your husband as in my case, to help you...they can make their own cards! Put on a movie, a plate of cookies nearby, and dooooo it.

Okay, so here are the basics you need:


  • 2 color ink pads, he
    • I use the brand "color box," more expensive, but the colors come out beautiful
    • Estimated Cost: $12
  • 1-2 Stamps
    • I used ones that said Happy Holidays and another was a small snow flake
    • Estimated Cost: $6
  • Glitter glue
    • I use clear, it goes well with everything
    • Estimated Cost: $2
  • Cards + Envelopes, any color you want
    • I used sparkly red, but in the past I've used lavender purple, green, etc.
    • Estimated Cost: Depends on the brand you get, and how many
I got all my supplies from Michaels. So like I said, you'll have to invest between $20-$25 up front, but you have card making supplies that make make a plethora of cards. Again, you can also jazz it up in your own way, get pretty ribbon and glue dots, and add some ribbon to your cards. 

Maybe get embossing powder and an embosser and get a little crazazy? Just me? Okay. 

An embosser and powder. Seriously, it's awesome.
Anyways, first, set up your situation:

--You want a drying station, where you can put the cards after they're made

--You want to have a small bowl with water, and dry paper towels nearby if you want to wash the color off your stamps or switch colors


Then you just go! Lay down a card, decide what color your want to use for what, and start stamping! 
My Mess
A few tips: 

--After you lay the stamp on your card, don't move it, just apply even pressure across the stamp. Even the slightest movement will lead to "ghosted" stamps. 

--If you screw up and the stamp is tilted, whatevs, go with it, use the glitter glue to make it look chic. 

--Expect to mess up a few times, I've been doing this for a while, and I still screw up.

Have fun, make some cards, and send them to people you love. It'll put smiles on their faces! 

Wednesday, October 19, 2011

How To...Make Your Chucks Look Fresher

As a teacher, I almost never sit down between the hours of 8:45 - 4:15 Monday - Friday. I'm either up at the board, flitting between students, or generally hopping around teaching Biology. 


So I don't wear heels. I wear my good ol' Converses to school, or as my students call them "my nasty chucks." 


Why nasty you ask? Because I've had them for 1.5 years now, and they're kinda dirty. Not gross dirty, just that they're less shiny and new. 


My students value shiny shoes very highly. I see them frequently cleaning/wiping off their shoes to make sure they stay "fresh." Anyways, my shoes got to the point where I had a student bring a brush to school and offer to clean mine. 


I can't help it if I wore them gardening...


But I digress...this post is about how to make your Chucks, or any tennis shoes really, shine again! It's quite simple really. 


What you need
Mr. Clean Magic Eraser (the regular kind, off brand works too, it's what I used)
A bowl of water 


How to do it


Cut a magic eraser in half, so its easier to hold. Then dunk it in water, and start scrubbing your shoes. It honestly doesn't take that long to see much of a difference. The magic eraser will slowly start to fall apart, that's okay, just make sure you're not sitting on a rug or carpet, otherwise it just makes the cleanup harder.


That's about it. Keep scrubbing until it's as clean as you want it. Whenever the eraser startes to get dry, dunk it in the water again. 


Proof
For this one, I just used the magic eraser along the top quickly. The picture on the left is the uncleaned shoe, and the one on the right is just after a few scrubs with the magic eraser. Massive difference.

I haven't cleaned the left side yet, but look! The right side is waaaaay whiter! 


How it works


Basically the Mr. Clean scrubs are a type of fine-mesh abrasive plastic that feels really soft when it's in mass quantity, but it's quite abrasive at the micro-level...so it can get into all those nooks and crannies regular toothbrushes or scrubbing will miss. It's why it's such an effective cleaner! 

Sunday, September 25, 2011

How To Make...Homemade Sugar Scrub

Hey blog...it's been a while. It started out with me being like...meh, I baked this thing, I'll blog it later. 


Then a few days later...I'd be like, "BLASPHEMY! Some social injustice has occurred, I must blog about it!" and about half way through the post, I'd get sucked into an episode of Charmed, or realize that I should be lesson planning. 


Then a week later, it'd become this awkward mess of...it's just really silly to go back and finish that post now...or I'll do that later, or...well, I really have nothing interesting to say. 


Awkward. Especially since I still have nothing new to say. 


Except to share this awesome homemade sugar scrub. Seriously, you need to make it, it's super easy. Friends who are reading my blog, expect this for winter presents! 


My friend Laurie, from Laurie's Little Kitchen, gave me this amazing Rose Spice sugar scrub a while back, and I was like "holy shennanigans! You made that?" She nodded, humbly. That woman can make almost anything I would buy outside, at home. If you haven't checked out her blog, DO it. 


Anyways, I proceeded to use that sugar scrub up WAY too fast. It was awesome, I would always leave the shower feeling both refreshed and with super soft skin. When my container was empty, I was like GAH, can I ask her to send me more? NAY! I shall make my own. 


Of course I reserved like an hour and a half to do it, thinking it was super complicated. Yeah, no. It's three ingredients. And took me 5 minutes. Make some of your own, it's amazing. 


You'll need: 


1 Plastic Container
2. Olive Oil or Vegetable Glycerin

  • Glycerin -- you can find it at your local whole foods. It is basically scentless, so if you hate the smell of olive oil, use this. 

  • Olive oil -- I used this. Adds a pretty color, smells good to me.

3. Sugar
4. Optional -- Essential Oil or extract you want to scent your scrub with. I used Lavender essential oil. 


1. Find a plastic container.
Awkward Picture, but it smells amazing

I just re-used the one Laurie gave me. I wouldn't suggest glass, because well, if you're going to keep it in the shower...yeah, self-explanatory. 


2. Fill that container with white sugar. Fill it FULL. 


Scrub a-dub-dub

I used raw sugar because it's usually coarser, but honestly, you can use regular too. Fill it FULL, because the oil or glycerin weighs it down. 
Ignore the wrinkly hand, look at the pretty scrub
3. Pour the glycerin or oil in slowly. 


It'll sit at the top first, but use a spoon to mix it into the sugar. This step takes the most time. 


4. Optional -- mix in a few drops of essential oil or extract (vanilla, almond, whatever floats your boat), it's great.


Note -- This a body, not face, sugar scrub.