Saturday, August 22, 2015

This. Almond. Tart.


I just finished eating a slice. It is so good. Simple, not too sweet, not overwhelming. Just the cookie-like crust, the slight tang of the jam and the wonderful flavor of the almonds. My words of advice: if you don't have almond meal, you can make it easily by pulsing whole almonds in a food processor. Pulse them because you want almond meal, not almond butter. Please don't skip out on the layer of jam on the crust, it add to the flavor. Pick a jam that isn't too sweet and has a little tang...it'll go a long way. I'd go with apricot, or sour cherry. Enough with the words, on to the recipe.


Almond Tart 
Slightly mdified from Cooking with Manuela

Tart Crust

2 egg yellows (save the whites for the filling)
0.33 cups sugar
1 tsp vanilla
2 tbsp milk / heavy cream (I used heavy cream)
1.5 sticks butter, cubed
2 cups all purpose flour
pinch of salt

Preheat oven to 375F.

In a food processor or with a hand mixer or even in a stand mixer, beat the egg yellows and sugar together until well combined. Then add the vanilla, heavy cream/milk, salt, and mix. Then beat in the butter until it's mixed thoroughly with the liquid (it doesn't have to be smooth, just mixed). Then, mix the flour in a 1/2 cup until it comes together. Since this is a tart dough, it'll be wetter than usual crust, and that's okay. Transfer the dough into a pre-buttered and floured tart part, sprinkle a little flour on top of the dough, and press it out thinly into the pan. You want the tart crust to be thinly spread because it will rise, so you can peel off any excess. Poke holes in the base with fork tines so that no bubbles form during the baking process and put it in a 375F oven for 20 minutes.

While it's baking you can make the filling:

Filling
0.25 cup jam (tart and sweet, but not too sweet -- apricot, blackberry, cherry. I used a jam from my friend Laurie over at Laurie's Little Kitchen)
5 egg whites
0.33 cups sugar
2 cups almond meal
Slivered almonds for topping

You can either buy the almond meal or make it yourself (see above text prior to recipe). Beat the egg whites to stiff peaks. Add in regular white granulated sugar, and fold it in by hand. Then add in the almond meal, and fold in well. You'll see the egg whites deflate a little, but that's okay, just make sure you're folding, rather than stirring the stuff in.

Now...to assemble the tart! After the shell comes out of the oven, turn your oven down to 350F. Pour the jam filling into the tart and spread it out, creating a thin layer. Then pour the filling into the tart and spread it out with a spatula/spoon. Top with silvered almonds. Bake for 20-25 minutes, until the top is slightly brown.
Jam!
Pre-baking
Pull out, let cool, and serve with powdered sugar dusted on top, or by itself.

So good

Immediately post-baking


Friday, August 21, 2015

Cauliflower Bowl

I want to do things this summer/fall. I'll make a list. That way I'll get like 80% of them done.

1. Kayak on the charles
2. Get through Native Son, Notes on a Native Son, Queen of Shadows, and Lolita. A mix of books.
3. Join a book club.
4. Go camping x 2...hopefully in New Hampshire. Or the Berkshires!
5. Paint something
6. Finish applications...that way I know I do AT LEAST one thing
7. Train my dog to do 1 new tricks.
8. Run 2 miles at < 10 minute pace for each.
9. Finish Insanity
10. Find and purchase my "fall tea" collection.
11. Perfect my banana bread recipe.
12.  White Mountain Hike.
13. Start posting weekly menus


Thirteen things. I'll come back and mark them off as I go along. Hopefully. But this way I've articulated it, it's on paper....or e-paper in this case, and when I'm thinking...what should I do? I do this stuff. Instead of watching Fraiser. Too much Fraiser.

And now for something entirely different, a cauliflower bowl! I've been skeptical about cauliflower "rice" for quite some time. I've seen it all over other blogs, on pintrest, and some of my friends have gone on about how much they love it. But meh.

Then I saw this great cauliflower rice bowl from ohmyveggies.com and figured...why not? I have the time, I didn't yet have my articulated list of pre-prescribed activities. Plus, I think I can do it under 30 minutes. Hey, if I can make it in <30 minutes on a weekday, I'll give it a shot.

And this worked. The "rice" has no real flavor...so it's takes up the taste of whatever you season it with, in my case a little garlic, salt, pepper, and lime juice. It acts as a medium over which you can layer other flavors, beans, guacamole, salsa, corn, cilantro, red pepper, etc. and is healthier than rice.
 
Finished product!

Surprisingly easy to make if you have a food processor, without...it'd be harder. I used the grater attachment on mine to get the cauliflower small. I just cut it into raw relatively large chunks, put it in the food processor, and it's done. You can also use a box grater...or just cut it up into small pieces.

Then just sautee it up with some olive oil or butter until it reaches the "softness" you desire. Try it out.

Cauliflower Rice Bowl (Mexican flavor inspired) 

1 head raw cauliflower
Butter/olive oil

Optional toppings:
Beans
Salsa
Guacamole
Red Pepper
Corn
Cilantro
Tempeh
Lettuce
Hot Sauce
Red Onion

Cut the head of cauliflower into pieces that either fit into your food processor/food processor shoot, or to use on a box grater, or cut into small (super small) pieces.

When it's grated, heat up a pan with 2 tablespoons olive oil or butter, add garlic or whatever other aromatics you want at this point, then toss in the cauliflower when warm. Sautee the "rice," turning it moderately frequently until it reaches the crunchiness or softness you desire.

Then top it with your toppings! I did a Mexican-inspired one (see optional toppings above). You can do middle eastern inspired with some yogurt, roasted eggplant, yams, and spices. Or try Greek inspired with cucumber, tomato, red onion, yogurt, etc. Or Asian inspired and top with a stirfry.

The "rice" keeps in the fridge for ~2-3  days, so you can reuse it :-)


Saturday, August 15, 2015

Chocolate Chili Peanut Butter Popsicles

During my fourth year, I've been more able to give things outside of medical school more focus than I could during my third year. It's still pretty novel for me, but I'm trying to enjoy it. Going on run and experiencing summer: the smells, the colors, the inevitable allergic rhinitis. Dog walking and the inevitable apologizing for Krinkle barking a dog 10x his size. Trying new recipes and the inevitable mishaps (never put turnip and beet in coconut curry) and the undeniable successes.


These popsicles fall into the latter category. I forgot I had these popsicle mold I bought last summer with dreams of all different kinds of frozen treats. In reality, I made 2-3 types of popsicles and packed the molds away. But I've been craving them recently, because let's face it...there's nothing like coming back from a run in the middle of summer like a popsicle.
Telling Tyler "pull out the popsicles, I want to take a picture" and hearing "...whoops"

Especially these ones: chocolate + chili + peanut butter + honey + milk/yogurt + salt + popsicle mold + freezer = Honey sweetened chocolate chili peanut butter popsicles. Clearly when it comes to dessert names, size matters.
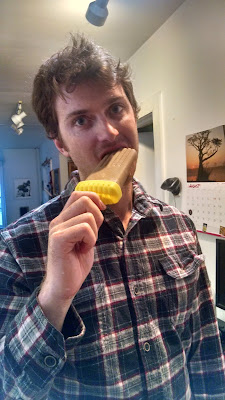
Evidence of their deliciousness

I made this in the morning in under 10 minutes on a whim. Try them out. If you're hoping to make it vegan, use full fat coconut milk. If you want to make them a bit healthier / don't love super sweet things, cut down on the honey by half.


Chocolate Chili Peanut Butter Popsicle

0.25 cup honey
1 cup milk / yogurt / half and half
0.75 - 1 cup peanut butter
0.33 cup unsweetened cocoa powder
1 tsp red chili powder / cayenne (or less if you want it less spicy)
1 tsp salt
Dash of cinnamon

Whisk together honey, milk, and peanut butter until there are no clumps. Then add in the cocoa powder, chili powder, salt, and cinnamon and mix until clumpless. Pour into popsicle molds and freeze for 3-4 hours. Pop them out on a warm summer day and enjoy!